In my case I want to pair this guide with a cache drive upgrade. Current cache is 120gb ssd, upgraded drive is a 1tb ssd. Since all the app data is already on the final destination 120gb SSD, can the steps be simplified?
Something along the lines of:
stop all dockers and stop array
move the 120gb drive to unassigned
assign the new ssd to cache
run a subset of the commands above to update the docker container paths
restart the array and dockers
The alternate is to follow the unraid cache drive swap instruction, move appdata off the cache to the array, swap drives, move appdata back onto the (new) cache drive, then follow the instruction above. That just seems a bit circular since the data ultimately ends up on the same drive where it started.
Ok so there are a couple caveats to my previous “it works” reply. First, you need to make sure the appdata is actually on the cache drive. Unraid doesn’t enable caching for the appdata by default, you have to manually change it. If you did, then your idea will work. You’ll still need to go through most of the steps in the walkthrough above, you can just skip step 7 since the appdata is already on the drive. If you didn’t change the cache setting, then you’re going to need to run through the whole process above after swapping the drives. The second concern is other data on the drives. I was running on a test platform with no other data on the cache drive. I’m guessing you’re not. So you’ll need to move all of the other data off the drive. Check the cache settings for all of the shares except the appdata share, and for any of them that are set to Only or Prefer, change the setting to Yes temporarily, but make a note of the original setting so you can change it back once the drive is swapped. Then, run the mover to put everything on the array. Once the mover is finished, you can swap the drives and proceed with the rest of the steps.
I’m getting an error when running step 10. Any advice?
Edit: I finished the rest of the steps and it seems like it is working, but I’d guess I still want that step to run?
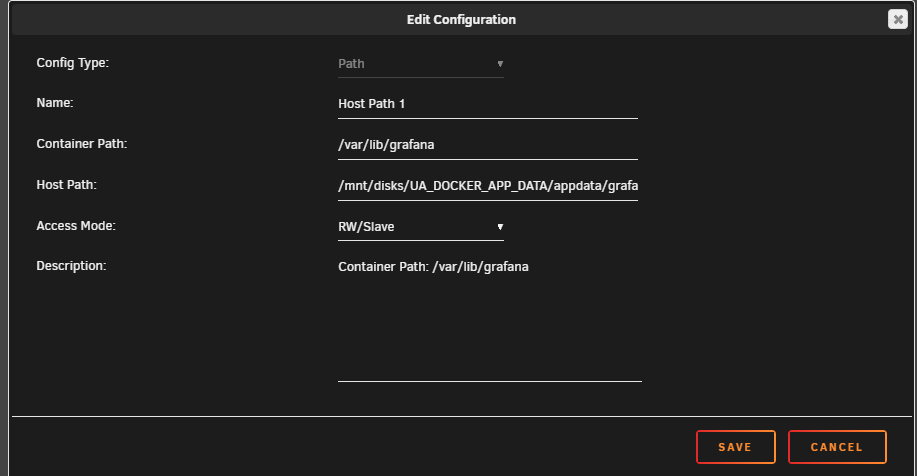
That’s strange, I don’t see any errors in the command you entered. The good news is that specific command just switches the appdata map to slave mode, so it can be done manually. The downside is you’ll need to change it on every container individually. Go into the container config, click the switch in the upper right to switch to advanced view, then edit the appdata map and change the Access Mode to rw,slave. Then save the config and move to the next one.
Question for you. Why the need to change the access mode when moving it to an unassigned device? And do I need to change that whenever I download a new docker?
Setting the mount to slave mode ensures the container will be able to see the files contained inside it. Any folders you map that are on an unassigned drive need to mounted in slave mode. Step 10 above changes the templates for the containers so if you ever reinstall the same container it will mounted properly. If you install a new container, you will need to update it manually.
I failed to do this when I made the change. Everything worked fine for about 3 days. Then I find that I had a run away log issue that was bringing my server to its knees and had to go back and fix all of my dockers.
I just made an account to say thank you so much @Mthrboard. The only hiccup I ran into was having to redo each Docker path, but thats acceptable for how simple the rest of this was.
Your description as why to do this too was exactly what I was experiencing and was trying to find a good way to go about doing this. Offloading my appdata to my nvme, and leaving my downloads folder on the SSD/Cache, because of the absurd IO wait I was experiencing.
Will this allow us to run docker images with the array stopped?
Given the amount of energy my SAS array takes and is still and issue of unraid not spinning down SAS drives, I want to be able to power up the server without the SAS shelve sometimes, but still be able to use some dockers and VMs,
My unraid is telling me Docker will start once the array is working… I already have my docker images in the cache drive.
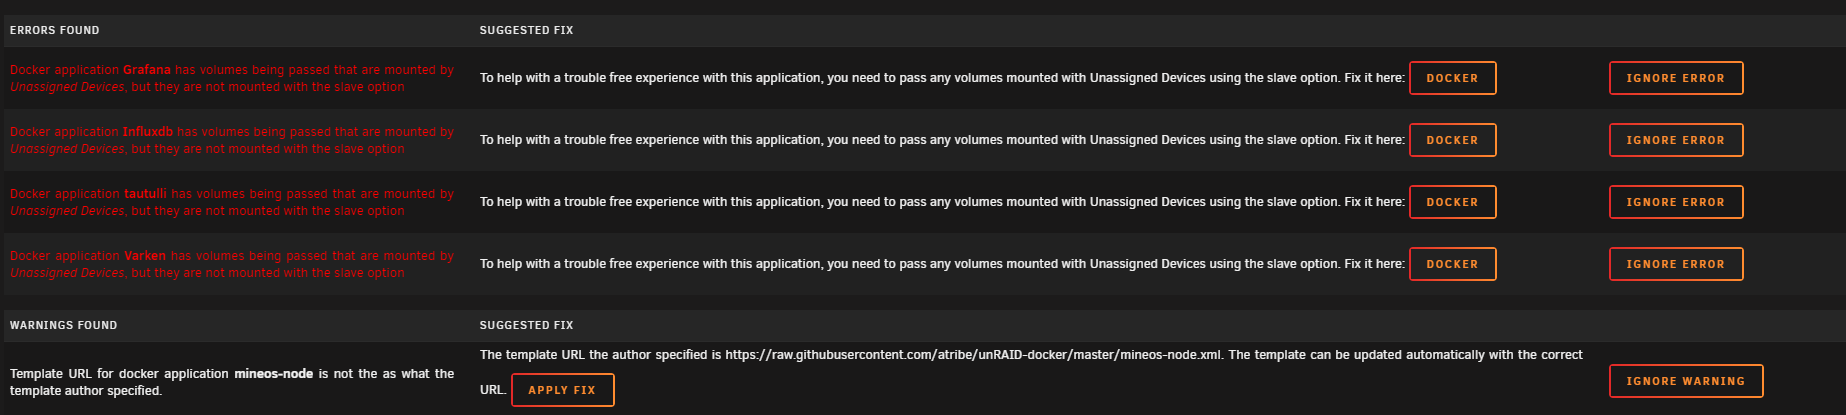
I followed the instructions to a T but its not worked properly. When I startup Unraid I have to disable Docker before starting the array and then when its started I can turn on Docker but quite a few of them don’t work and the docker screen looks like this:
Worked great and the 10+ dockers we have running at any given time are much more responsive. Nice to be able to get some use out of this old Samsung SM951 256GB PCIe SSD (AHCI Version) that has been collecting dust since its last use in a Z97 build while being faster than a SATA SSD.