That’s because RDP does not initiate the GPU’s display functionality. Which is why you cannot game on it, amongst other issues.
That’s why RDP isn’t used for the gaming portion of this guide.
That’s because RDP does not initiate the GPU’s display functionality. Which is why you cannot game on it, amongst other issues.
That’s why RDP isn’t used for the gaming portion of this guide.
Should I have installed the Nvidia graphics drivers? I never bothered…once I booted it up it was already showing Nvidia control panel so I assumed that’s what the vbios was for. Edit: I went ahead and updated it to the latest driver…worked fine.
I’m not gaming on this…I went through the process for the experience mainly.
First and foremost, thank you fore sharing this. I am looking forward to getting it running smoothly.
A few days ago I did 99% of the set of. This was working great but since I did not have a dummy plug I used an actual monitor plugged in to my GPU. I ordered the dummy plugs from Amazon and they arrived today. I turned off the VM, I unplug the real HDMI cable, and inserted the dummy plug. When I went to restart the VM this would not boot. I tried the second dummy plug that came in the package but I had the same issue. I went back to the real HDMI cable and the VM started no problem. While the VM was running I switched the HDMI cable for the dummy plug and this seemed to work. Unfortunately when I restarted the VM I had the same problem where the PC failed to even post. Any ideas? Thanks for your help!
I’m going to build this setup:
Xeon X5650 6c/12t
12GB DDR3 1600
GTX 770 2GB
240GB SSD
2TB WD Red
Only 1 user is going to stream from the server.
What is the advantage of unRaid over a bare metal Windows 10 installation if using the server for gaming only and only 1 user?
Don’t get me wrong, I love unRaid and the concept.
You are going to have a really bad time encoding on that GTX 770, in fact I’m not even sure it would work.
If you haven’t bought those parts yet, look into the Ryzen 5 1600AF build I have above. It should be pretty affordable.
If you’re just building a standalone Parsec server, you do not need to use Unraid.
I love the seperate PlexBOX concept.
So a seperate Parsec node is ideal for me at the moment.
Until I invest in some new hardware with more cores, higher performance and lower power consumption.
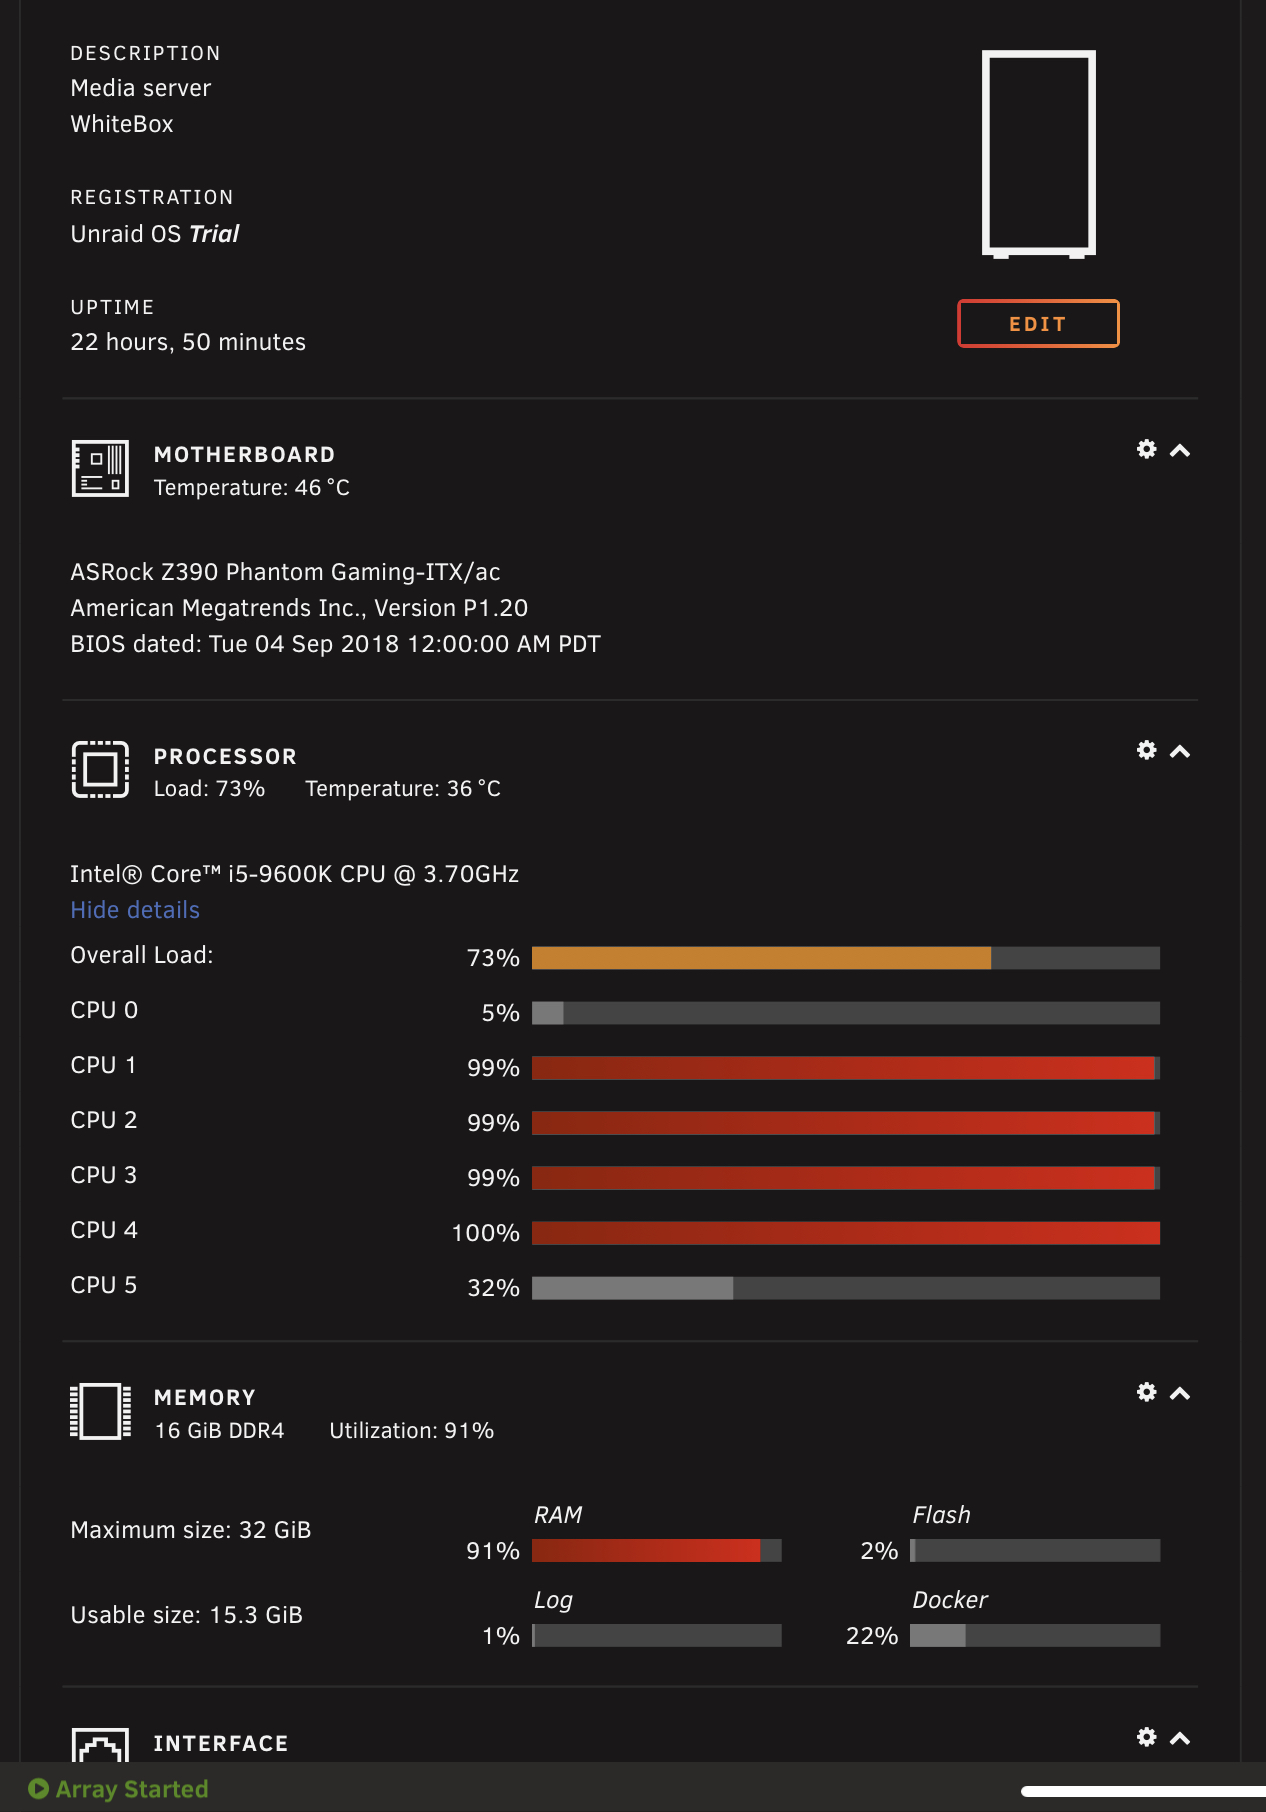
Awesome Guide, thanks for putting this together! So I tried this on my gaming build with an i5 9600k and Nvidia 2060 founders. I seem to keep running into the cpu maxing out the 4 cores I have given it.
Wondering if Modern Warfare is just too much for only 4 cores…
Core 0: Unraid
Core 1: VM
Core 2: VM
Core 3: VM
Core 4: VM
Core 5: emulator pin
Not sure if I have something possibly misconfigured or if I simply just need more cores.
Any ideas?
Have you tried the hyperv experimental settings?
Rebuilding from scratch, I will give the hyper-v settings a shot next.
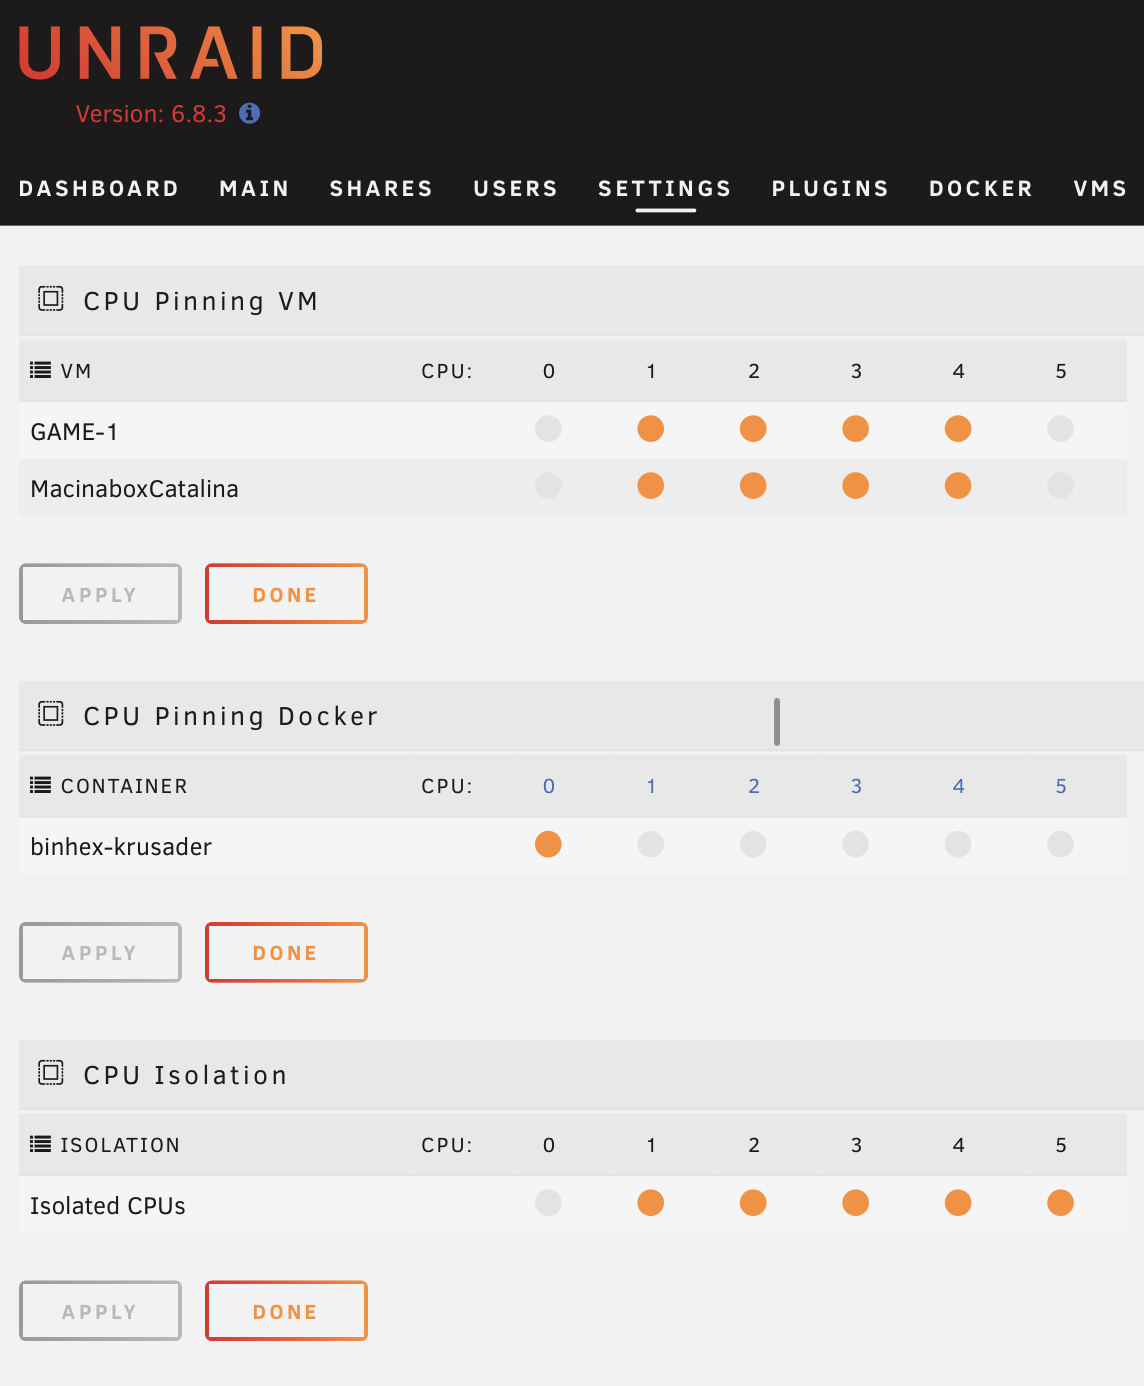
Could you share your pinning strategy as well?
Here’s my current pinning strategy:
I just enabled hyper-v, will test that tomorrow again with COD. I reinstalled from baremetal up.
Ok so with current cpu pinning, no other running VMs or docker containers. I am able to now get 60 FPS mid to high level graphics on COD. There is a lot of tearing however. But at least the CPUs are 100% maxed out, although they range mid 70%-95% typically. Also the windows 10 anti malware was using a lot of cpu power north of 15% on the VM, disabled that, helped tremendously.
It’s getting better albeit slowly.
Here is also my current XML:
Same problem. Attached is my XML if you have a chance, would appreciate you giving it a look. Thanks!
EDIT: Okay, so I changed the drive location to Auto instead of using my Unassigned Drive and now it works. Seems to only freeze if I’m using my unassigned drive SSD. Very werid.
The GPU passthrough section should be updated to include the VFIO-PCI CFG plugin to configure the pci devices you want to bind. After using that plugin you will no longer need to edit the syslinux.cfg and add the vfio-pci.ids. Next the only VM xml change you’ll need to make is making sure hyperv is turned on, a vendor_id value is set, and kvm hidden state=‘on’. You won’t have to do any of the bus, slot, function, multifunction changes to the hostdev pci entries. If you have the bus, slot, function changes, you’ll get the error 43 or blackscreen.
<features> <hyperv> ... <vendor_id state='on' value='whatever'/> ... </hyperv> ... <kvm> <hidden state='on'/> </kvm> </features>
What’s the advantage to doing it this way?
hey love this guide,
I get the following issue, how would I resolve this? thanks in advance for any help
2020-05-25T11:53:39.089865Z qemu-system-x86_64: -device vfio-pci,host=0000:0a:00.0,id=hostdev0,bus=pci.0,addr=0x8,romfile=/mnt/cache/isos/myrom/GP107.rom: Failed to mmap 0000:0a:00.0 BAR 3. Performance may be slow
and I’m also getting code 43 on the device in windows vm
Can you post your XML and some screenshots?
I will shortly I’m just going to start from scratch,