Overview
So you’ve finally convinced friends and family to use your Discord server for your Plex server communications? Congrats, that was the hard part. Now it’s time to maximize Discord functionality and make it work for you. This guide will explore how to setup real time media added notifications from Plex to Discord, using Tautulli.
If you tend to add a lot of media very quickly, or if you’d just rather receive notices less frequently with more summarized info, click here for the excellent alternative guide by @KINO
If you’d like to go ‘full throttle’ and receive real time notices, continue reading below!
0. Prerequisites
All of these tools are required for this setup to function. Please read, understand, and setup each of the prerequisite parts before proceeding.
1. Plex Media Server (click me)
- This guide assumes you have installed Plex Media Server. Plex install and configuration will not be covered in this guide. However, there are plenty of resources available both internal to this forum and externally for setting up Plex Media Server.
2. Tautulli (click me)
- This guide assumes you have also setup Tautulli and successfully integrated it with your Plex server. This is required. For this use, Tautulli serves as a bridge between Discord and Plex. Tautulli also serves other functions, such as monitoring and analytics for your Plex server, which we will not cover in this guide. If you have not installed Tautulli yet, click here for the official install wiki.
3. Discord (click me)
- Additionally, this guide assumes you have setup, or have appropriate access to, a discord server. You must have either full admin permissions, or both modify channel and modify webhook permissions. Here we are going to create a single text channel and a single webhook for that channel.
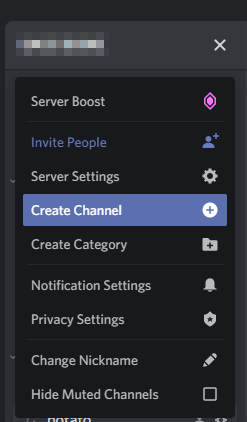
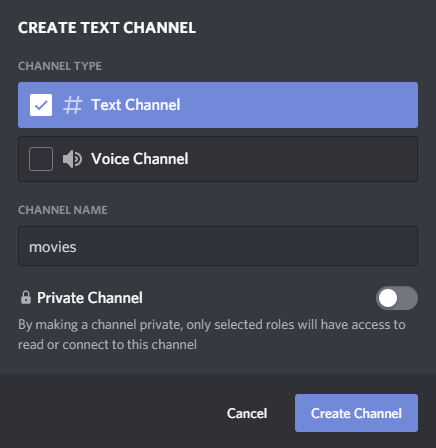
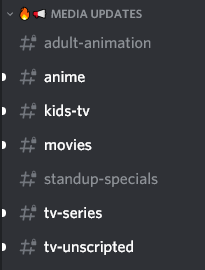
- Click the drop down arrow next to your server name, click “Create Channel” and name it appropriately. Ensure it is a text channel, and NOT a voice channel, then click the “Create Channel” button.
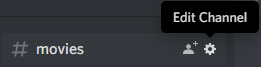
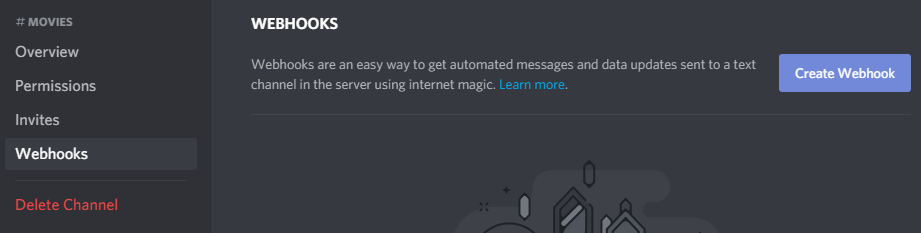
- Click the gear icon labelled “Edit Channel” next to the channel name.
- Click “Webhooks” on the left column, then click “Create Webhook” on the right.
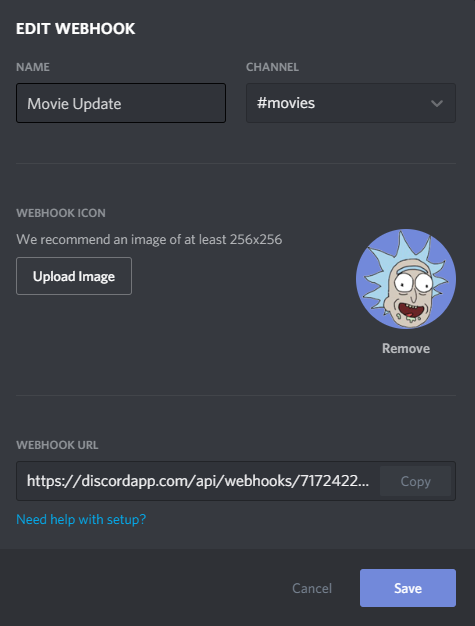
- Name the webhook appropriately, and optionally give it an image. Click the “Save” button. This image will show as the webhook message “bot” icon. It is important to note that this is not a bot, but because webhooks are controlled by external sources, they show a “bot” user label with each message.
4. Imgur (click me)
This is optional, but recommended for posters to be included in the notifications.
- Log in or Sign up for an Imgur account
- If it’s a new account, verify the account
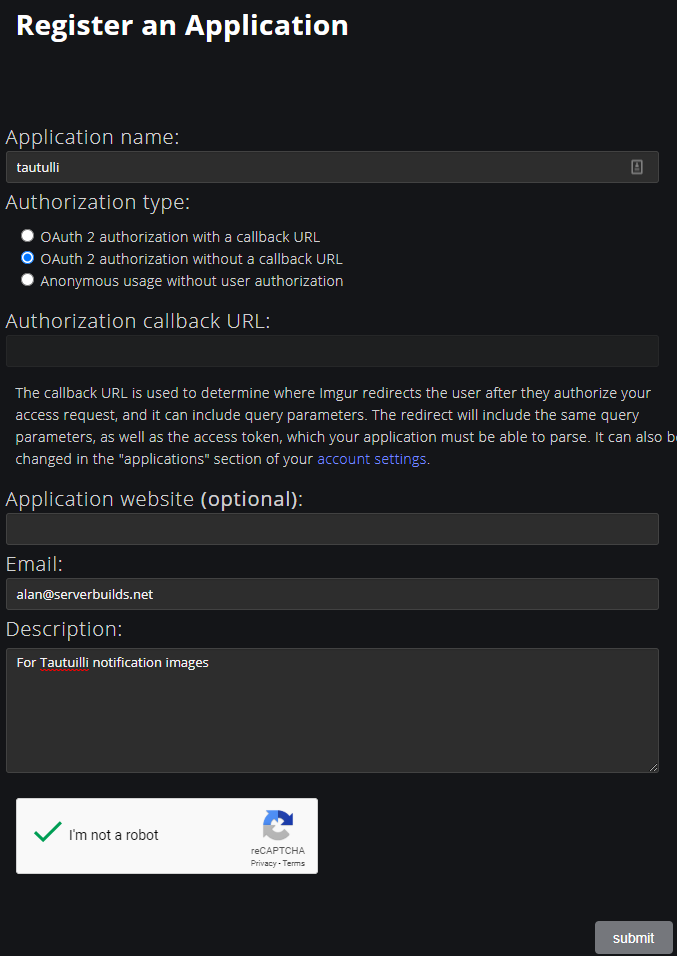
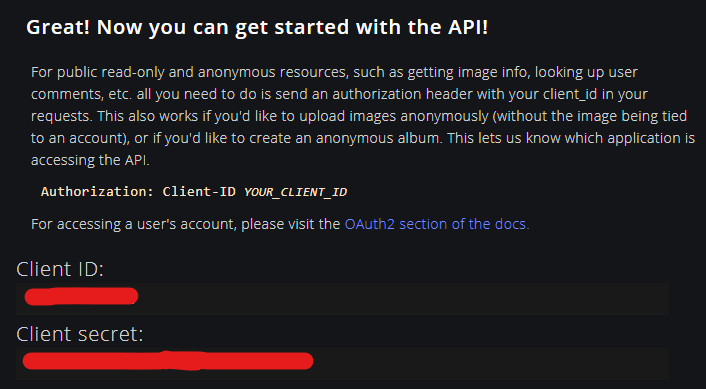
- Register a new application
- Enter a name in the “Application Name” field.
- Click the option “OAuth 2 authorization without a callback URL.”
- Enter an email address in the “Email” field.
- Enter a description in the “Description” field.
- Click the CAPTCHA checkbox.
- Click the “Submit” button.
- Copy the Client ID. We will need it for the next section.
1. Tautulli Prep
1. Imgur API (click me)
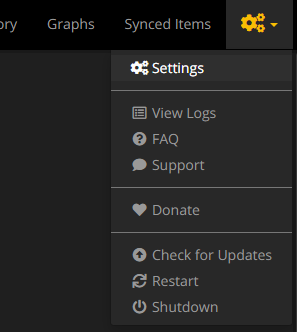
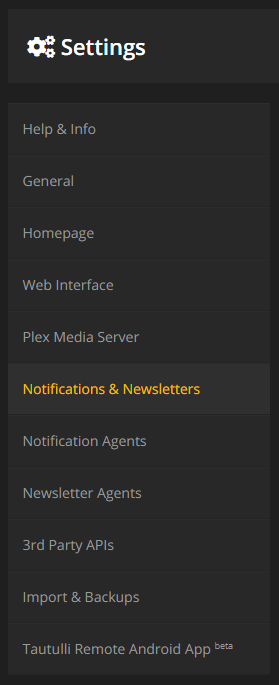
- In Tautulli, click the gears icon in the top right, or hover the mouse over it and click “Settings.”
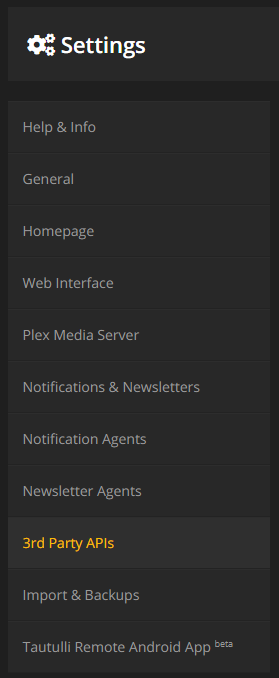
- On the left column, click “3rd Party APIs.”
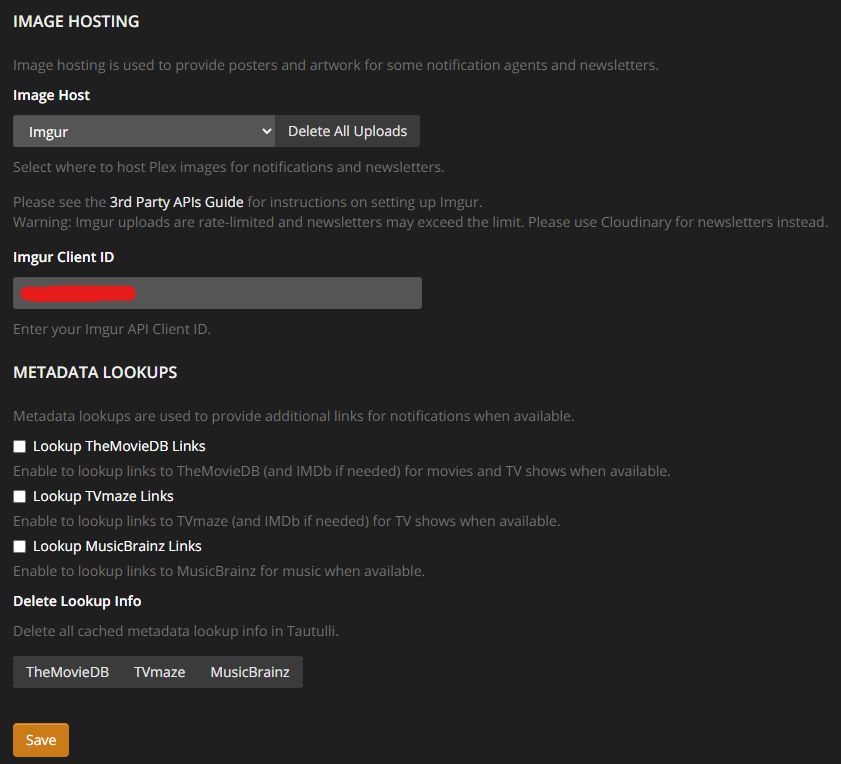
- Select “Imgur” as the image host. Paste the Imgur Client ID we copied from step 0.4.10 above, then click the “Save” button.
2. Notifications & Newsletters (click me)
- On the left column of the settings page, click “Notifications & Newsletters.”
- This setting optional but recommended. When enabled, if multiple media items are added consecutively, notifications will be grouped appropriately for Season, Album, TV Show, or Artist.Scroll down to “Recently Added Notifications” and check both boxes for “Group Notifcations…”
- This step only applies if the previous step options above are enabled. Set “Notification Delay” to the desired amount of time in seconds. This delays notifications for the potential grouping of media added consecutively. I highly recommend setting this to 300 seconds or higher to allow Plex to grab the appropriate metadata and poster artwork. For my own use, I have set this to 600 seconds (10 minutes).


Group Notifications
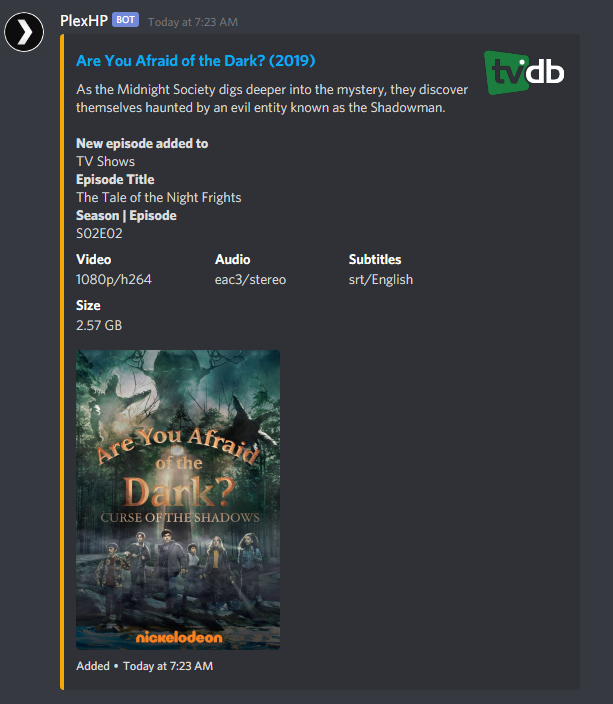
A notification delay is applied to all media added. However, grouped items (such as episodes of the same show, or music from the same artist, etc) added consecutively will increase the delay for each new related item before sending a single grouped notification. This will happen until related media is done being added consecutively, or until the delay time between items is met, whichever occurs first.Metadata Retrieval
This delay also allows Plex time to grab the proper metadata before notifications are sent. Without the delay, notifications will look pretty bare with no show/movie info, and a screencap is sent instead of a proper poster.
- Scroll down to the bottom of the page and click the “Save” button.

2. Primary Setup
This setup is for sending all Plex media updates to a single discord channel only, using the webhook created above in step 0.3.4.
1. Notification Agent Test (click me)
- We will do a basic setup and test of the discord webhook first.
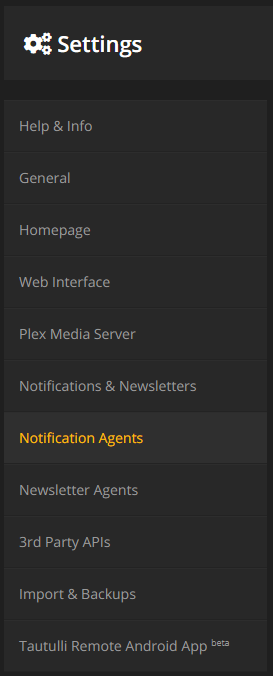
- On the left column of Tautulli Settings, click “Notification Agents.”
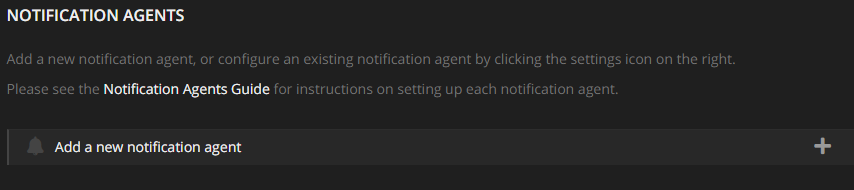
- Click “Add a new notification agent”
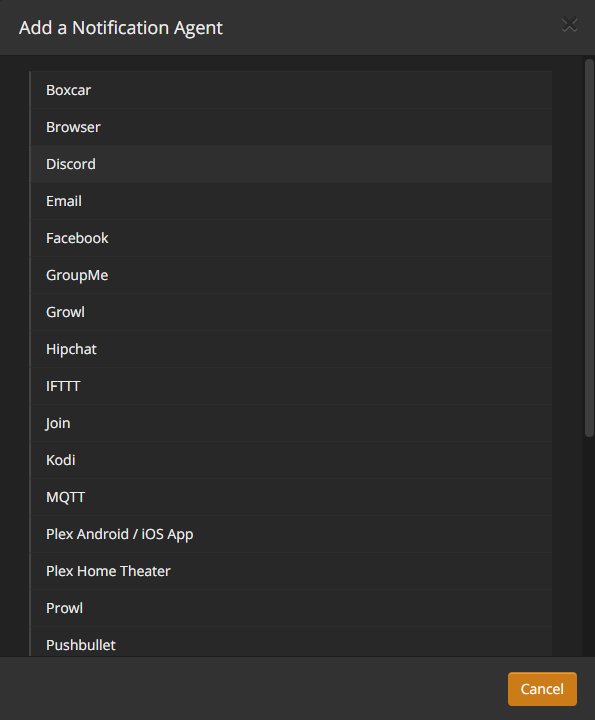
- Click “Discord.”
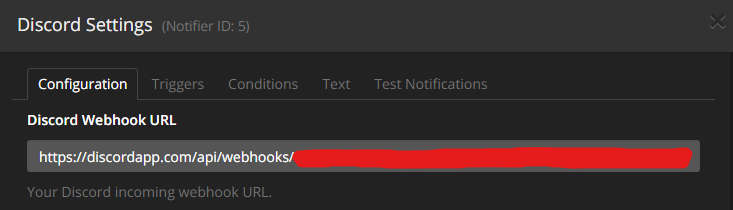
- A window titled “Discord Settings” will pop up. “Click the Configuration” tab. Copy the Discord Webhook URL from step 0.3.4 and paste it into the “Discord Webhook URL” field.
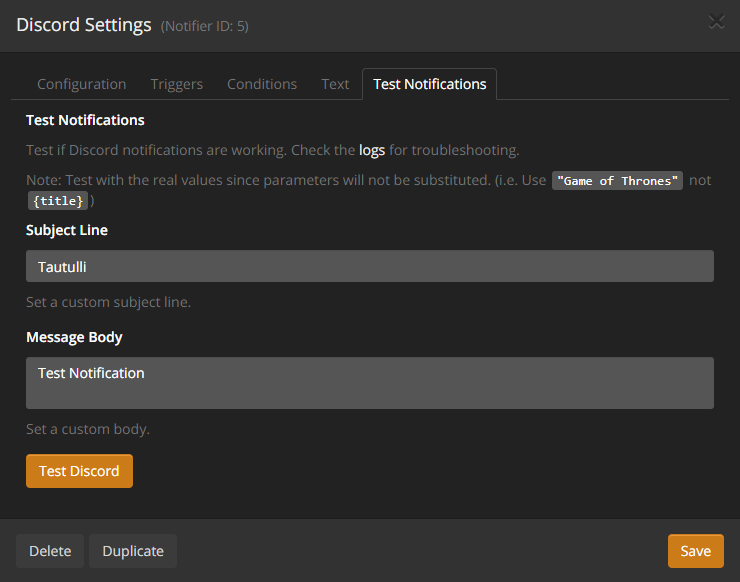
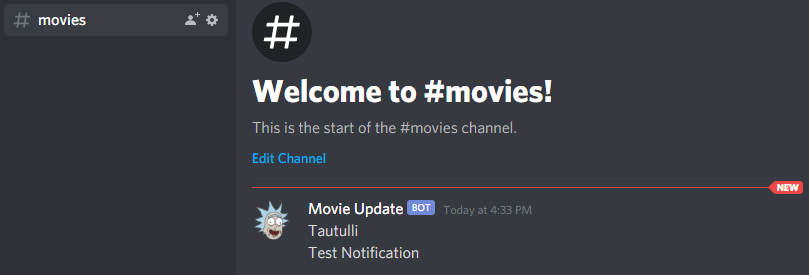
Click the “Test Notofications” tab and click the “Test Discord” button. You should see a test notification in the Discord channel created in step 0.3.1. If the test notification works, proceed with the rest of the steps. If the test fails and no notification shows, go back and review your steps to find the error.
2. Configuration Tab (click me)
- Now that the webhook is tested and working, we will finish the notification agent setup.
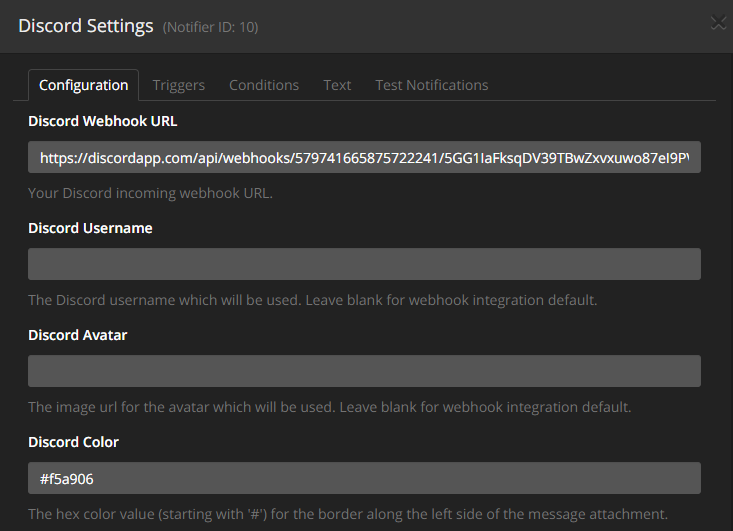
- Optional: Embed Color. Click the “Configuration” tab. Set the “Discord Color” field to a hex color code of your choice. I chose
#f5a906because it’s closer to the Plex color branding. If you’d like to use Serverbuilds Blue,#3491ffis the correct hex color code.
- Scroll down and set the following check boxes as desired. I set mine as pictured for the following reasons:
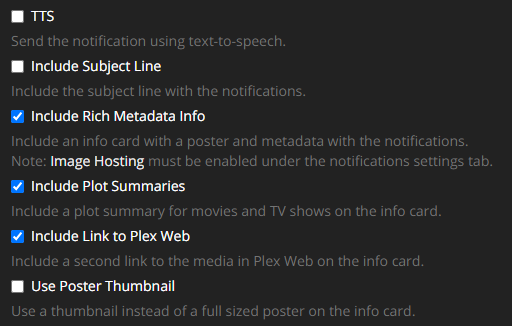
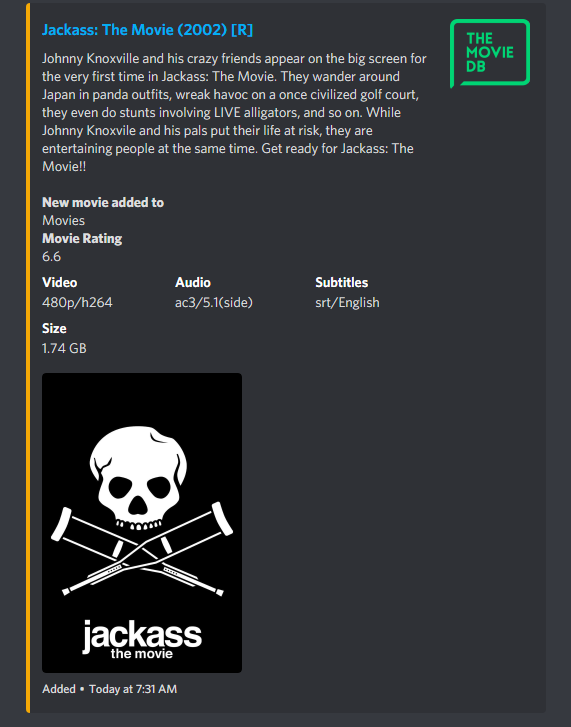
Check Box Option Reason (Unchecked) TTS: This sends an audible text to speech message in discord. (Unchecked) Include Subject Line: IMO the spacing is too close when using a dedicated subject line. (Checked) Include Rich Metadata Info: Contains the metadata we want to display. (Checked) Include Plot Summaries: See above. (Checked) Include Link to Plex Web: A direct link to the item in your Plex library. (Unchecked) Use Poster Thumbnail: Uses much, much smaller poster images.
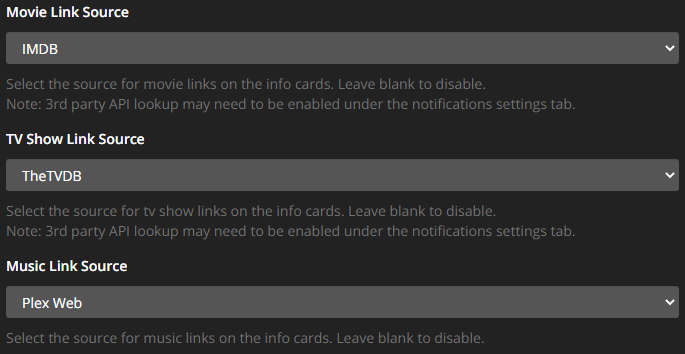
- Scroll down and set the following media source drop down options:
- Movie Link Source: IMDB
- TV Show Link Source: TheTVDB
- Music Link Source: Plex Web
- Optional, highly recommended: Set the “Description” field appropriately. I highly recommend naming it based on the library/channel name for easy identification. It can otherwise get confusing if there are multiple unnamed agents.

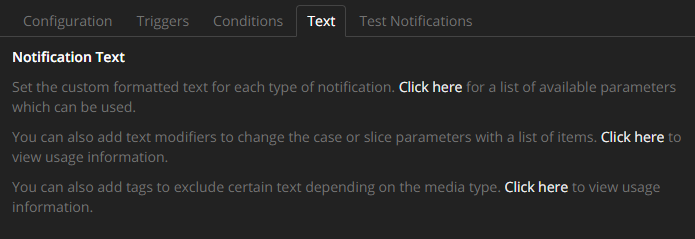
4. Text Tab (click me)
- Click the “Text” tab. Observe the Notification Text references at the top. These will apply to the next step.
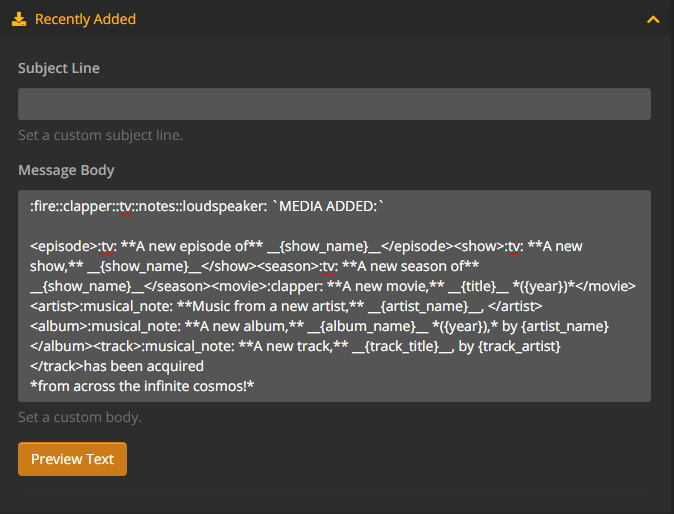
- Scroll down and expand the “Recently Added” section. I left the “Subject Line” blank due to tight spacing, as mentioned previously. Feel free to change this if you’d like.
Copy and paste the text below into the “Message Body” field. Additionally, feel free to dissect it, customize it, improve it, etc. The usable tags and parameters are referenced in the above step 2.4.1. There is no limit to what you can do (aside from the 2000 character discord message limit).

Sacred Text:
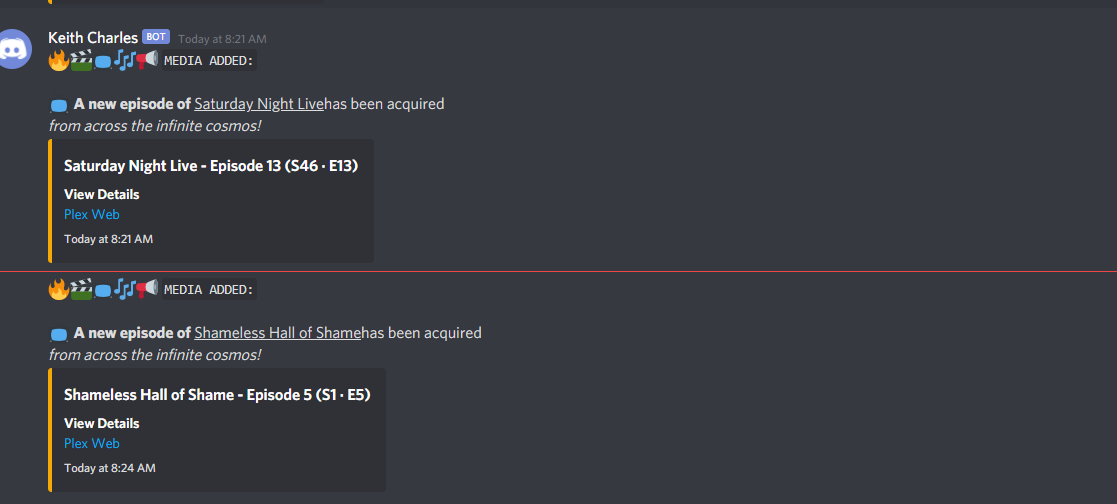
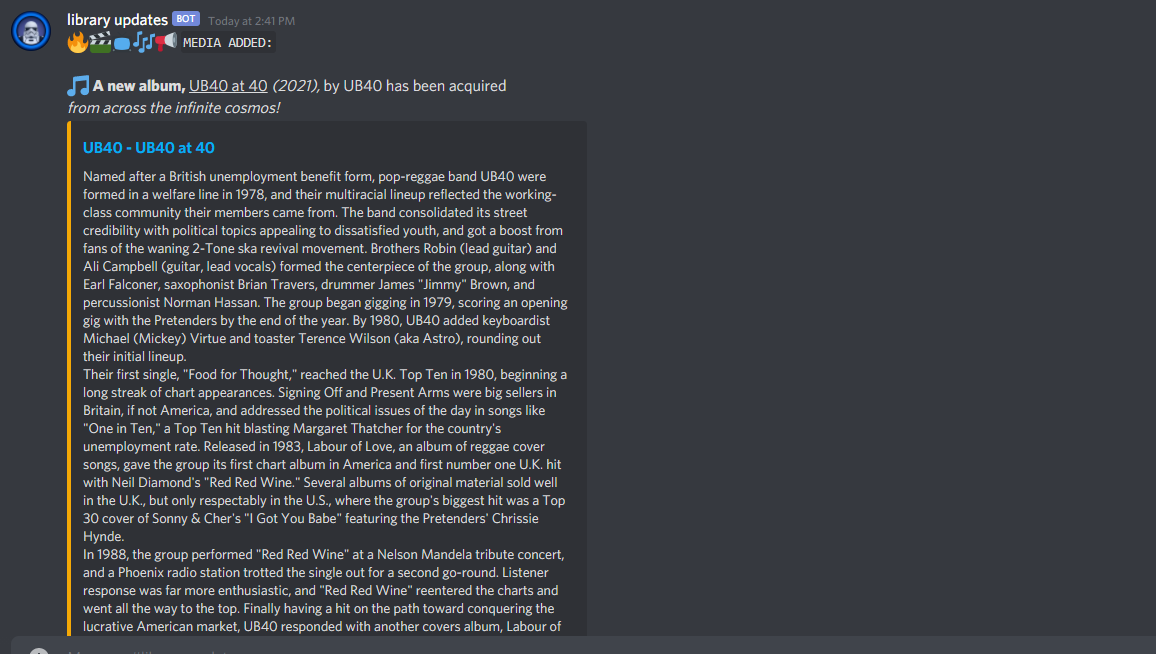
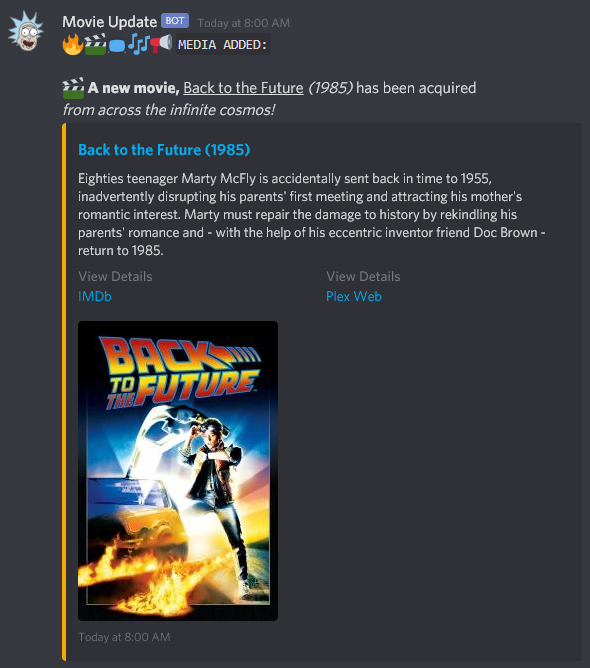
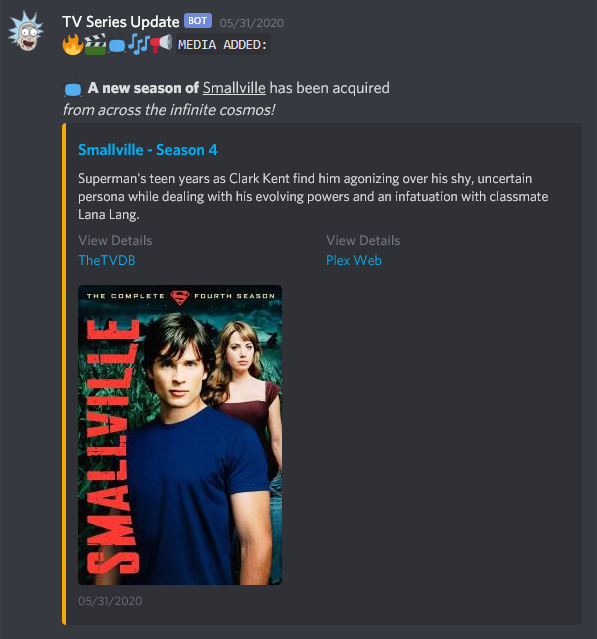
:fire::clapper::tv::notes::loudspeaker: `MEDIA ADDED:`

<episode>:tv: **A new episode of** __{show_name}__</episode><show>:tv: **A new show,** __{show_name}__ </show><season>:tv: **A new season of** __{show_name}__ </season><movie>:clapper: **A new movie,** __{title}__ *({year})* </movie><artist>:musical_note: **Music from a new artist,** __{artist_name}__, </artist><album>:musical_note: **A new album,** __{album_name}__ *({year}),* by {artist_name} </album><track>:musical_note: **A new track,** __{track_title}__, by {track_artist} </track>has been acquired
*from across the infinite cosmos!*
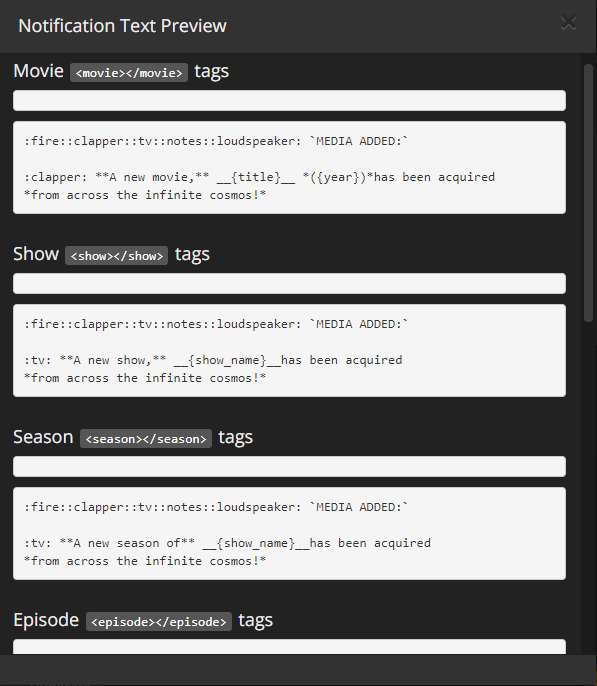
- Optionally click the “Preview Text” button to preview each media type tag. This will only give a rough idea of how each tag should format, as the formatting is not parsed in the Notification Text Preview. Click the “Save” button. The window will stay open after saving. Click the X button, or click outside the window to close it.
If you would prefer to only use a single channel for discord notifications, congrats! You’ve completed the primary setup!
If you have more than two Plex libraries, you may be interested in the Extended Setup below. In the Extended Setup, notices are split up by channel, one for each Plex library. The Extended Setup instructs you to reproduce some of the previous steps without explaining them again. Please read through and understand the Primary Setup above before attempting the Extended Setup below.
3. Extended Setup
1. Additional Discord Channels (click me)
- For each Plex library in your Plex server, create an additional discord channel. Then create a webhook for each new discord channel. For reference, we are essentially recreating steps 0.3.1 to 0.3.4 for each new discord channel.
2. Additional Notification Agents (click me)
- For each new discord channel that you created, create an additional notification agent in Tautulli. For reference, we are recreating steps 2.1.1 to 2.4.2 for each new notification agent.
3. Conditions Tab (click me)
- For each notification agent, the conditions tab is where we will configure condition logic. This will allow us to to control each notification and send it to the corresponding discord channel only.
The way we are configuring condition logic to split this functionality up will vary based on Media Type. The 7 Media Type tags from step 2.4.2 correspond to 3 Library Types in Plex: Movies, TV Shows, and Music.
1. Movie Libraries (click me)
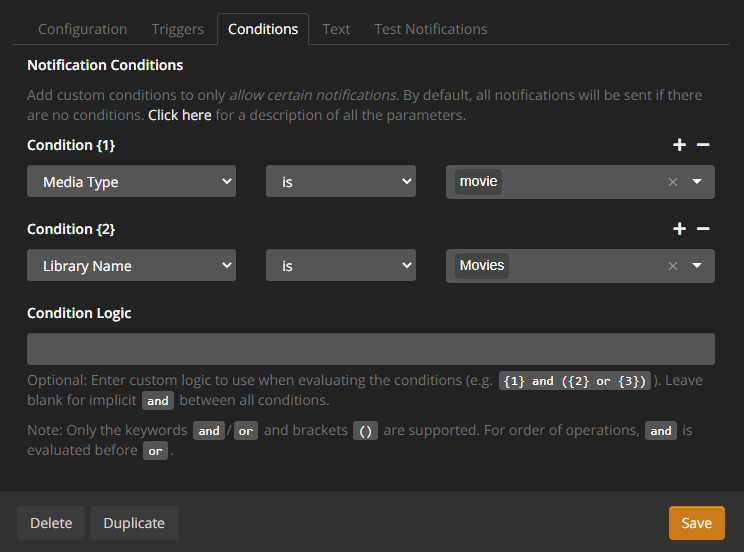
Set the following conditions on the corresponding notification agent.
- Under “Condition {1},” set the parameter to “Media Type.” Set the “Operator” to “is.” Set the “Value” to “movie”
- Click the “+” button to add another Condition line, “Condition {2}.” Set the parameter to “Library Name.” Set the “Operator” to “is.” Type in the “Value” to match the corresponding Plex library name. It must match the Library name exactly and is case sensitive.
- Because the media type “Movie” is the only tag that falls under the Movie library type, there is no Condition Logic to configure beyond the 2 condition lines. Click the “Save” button. Repeat these steps for each Movie Library in Plex.
2. TV Show Libraries (click me)
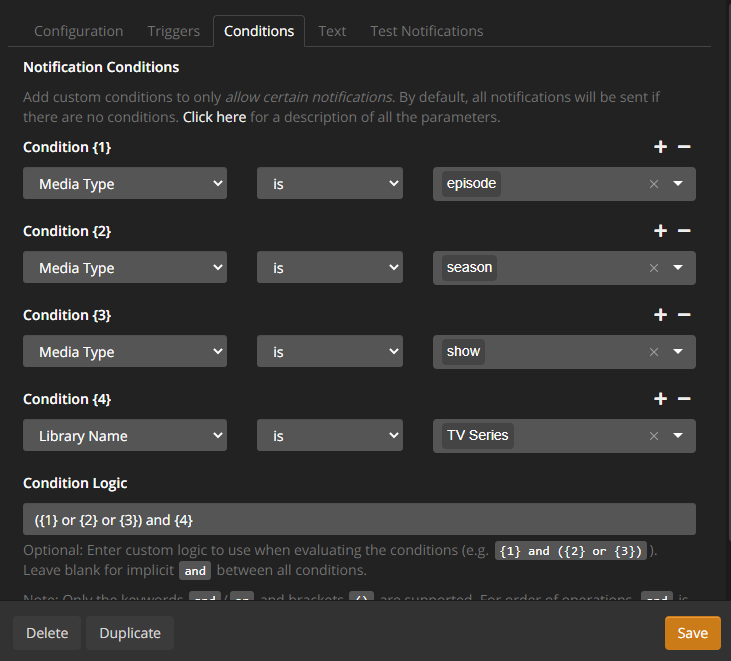
Set the following conditions on the corresponding notification agent.
- Under “Condition {1},” set the parameter to “Media Type.” Set the “Operator” to “is.” Set the “Value” to “episode”
- Click the “+” button to add another Condition line, “Condition {2}.” et the parameter to “Media Type.” Set the “Operator” to “is.” Set the “Value” to “season”
- Click the “+” button to add another Condition line, “Condition {3}.” et the parameter to “Media Type.” Set the “Operator” to “is.” Set the “Value” to “show”
- Click the “+” button to add another Condition line, “Condition {4}.” Set the parameter to “Library Name.” Set the “Operator” to “is.” Type in the “Value” to match the corresponding Plex library name. It must match the Library name exactly and is case sensitive.
- In the “Condition Logic” field, this is where we customize the logic to match what we need. In this case, we want to match 1 of the first 3 conditions, while also matching condition 4. Our simple formula does this with only brackets
'()'and keywords'and/or.'Since'and'is processed first, we bracket the first 3 ‘or’ operations to get the order correct. Paste this into the logic field:"
({1} or {2} or {3}) and {4} - Click the “Save” button. Repeat these steps for each TV Show Library in Plex.
3. Music Libraries (click me)
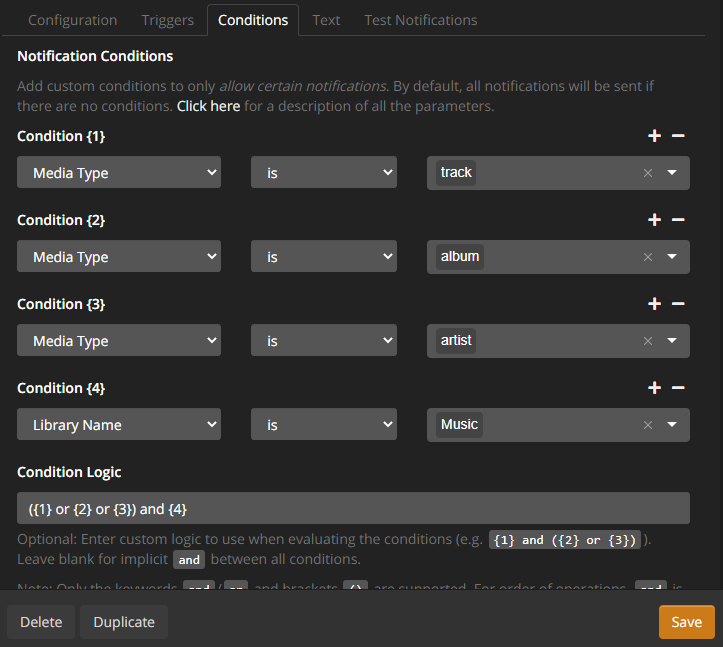
Set the following conditions on the corresponding notification agent.
- Under “Condition {1},” set the parameter to “Media Type.” Set the “Operator” to “is.” Set the “Value” to “track”
- Click the “+” button to add another Condition line, “Condition {2}.” et the parameter to “Media Type.” Set the “Operator” to “is.” Set the “Value” to “album”
- Click the “+” button to add another Condition line, “Condition {3}.” et the parameter to “Media Type.” Set the “Operator” to “is.” Set the “Value” to “artist”
- Click the “+” button to add another Condition line, “Condition {4}.” Set the parameter to “Library Name.” Set the “Operator” to “is.” Type in the “Value” to match the corresponding Plex library name. It must match the Library name exactly and is case sensitive.
- In the “Condition Logic” field, this is where we customize the logic to match what we need. In this case, we want to match 1 of the first 3 conditions, while also matching condition 4. Our simple formula does this with only brackets
'()'and keywords'and/or.'Since'and'is processed first, we bracket the first 3 ‘or’ operations to get the order correct. Paste this into the logic field:"
({1} or {2} or {3}) and {4} - Click the “Save” button. Repeat these steps for each Music Library in Plex.
Congrats, you’ve completed the extended setup!
If you made any customizations or improvements please share them here!