I built a server!
Specs
I was spurred into getting off the sidelines when the board and CPU deal was first posted. I sweated finding a PSU and coolers because everything was out of stock and prices were going nutty, but then we got a PSU Tech Deal and things were back on.
| Thing | Model | Cost |
|---|---|---|
| Mobo | Supermicro X9DRL-iF | $185.00 |
| CPU | 2 x E5-2650V2 (included with the board ^) | |
| CPU Cooler | 2 x Arctic 34 + GC Extreme 1g | $85.25 |
| Case | Fractal Define 7-XL | $218.38 |
| PSU | Butterfly Labs 850W 80+ Gold ATX Fully Modular | $67.52 |
| RAM | 4 x Samsung M386B4G70DM0-CMA4 32GB PC3 14900L | $187.16 |
| Fans | … | |
| Cables/etc | SATA power splitters | $12.47 |
| ATX/EPS Extenders | $23.90 | |
| SATA data cables (ugh) x 3 | $8.57 | |
| $788.25 |
RAM was purchased from eBay and isn’t a great deal, but it was late at night and it was a decent amount better than anything else I could find. Riggi chimed in after I purchased with some better options I wasn’t able to find on my own. Oops.
CPU coolers were eventually found on eBay for $36.99 each and I was desperate.
I really wanted a rack mount chassis, but in the absence of a reliable recommended model, I decided a tower was okay (since the Fractal was so so so beautiful, I didn’t need a ton of convincing). I wanted capacity for a bunch of drives, but sales on them have been not great since this build started, so we’re not running with much at the moment…
| Thing | Model | Cost |
|---|---|---|
| Drives | 2 x 12tb WD shucks | $395.18 |
| ADATA USA Ultimate Su800 1TB 3D Nand SATA3 SSD | $103.99 | |
| $1,287.42 |
I got two on the last NewEgg sale at only-slightly-more-than-you-want pricing, figuring you have to start somewhere and spreading out my batches would be useful. The SSD was also a Tech Deals ping on the Discord.
Pics or it didn’t happen
Building was pretty fun. It went a little something like this:

00: I ordered some parts

01: I opened some parts

02: Hey, cool! It posts…
Boy are those stock coolers terrible sounding, though.

03: And we were off to such a good start, too
And I was sloppy with my Gelid and used it all, so I didn’t want to unseat it all and file the end down, so I tried to boot using the slots not as recommended in the motherboard’s manual:

04: New RAM, wrong slots
Side note, the Arctic 34s are whisper silent. (In the video, you’re actually hearing the PSU fan [and my cat’s water fountain in the other room].)

05: To the case then
This case is so great. Converting it to Storage Layout™ was fun and felt like LEGOs or something. Everything fits together so well and is so sturdy and nicely made and smart.

06: Installing the PSU
I had to remove the ever-so-slightly-raised fan cover on the BFL because it just didn’t slide in with it attached. But the cage for the PSU has nice grills in the case itself, so this wasn’t troubling.
Note the glare and shadows indicating that we’ve burned almost all the daylight already. Spoiler alert, this will come back up in a few more steps.

07: Checking in with our build buddy
She was fine. I guess we keep going.

08: Standoffs
Installing the motherboard was…taxing. The backplate lists different configurations, so I just assumed things were pretty taken care of and didn’t pay a lot of attention. I was just setting the board down when I noticed the middle right hole seemed off, so I got that one swapped. I super didn’t notice the top left itty bitty shift until I had it semi-screwed in. Ugh ugh ugh ugh ugh.
That standoff was behind the pins attaching a DIMM to the board, and there were some slightly not-straight pins after my SNAFU (get it? ![]() ), but it seemed very minor and I was pretty sure everyone was going to survive. A few of you probably just heard some mildly ominous music cues…
), but it seemed very minor and I was pretty sure everyone was going to survive. A few of you probably just heard some mildly ominous music cues…

09: You may be seated
Quick side note for those following along at home. It might seem easier to seat the thing with your PSU cables flapping around still connected, but it’s not. Don’t do that. Especially when they’re going to just scatter your overly-organized piles of screws on the corner of the table.

10: Plugged up
Surprise! That super large case and super top-of-the-board connector and far-side-of-the-PSU-starting-point all conspired to juuuuuuuust not make it.
It’s dark out now, and you’re tired, and you’re frustrated and you don’t have a server. So you lie on the ground and order some extenders from Amazon.

11: A few days later

12: Great success

13: In which the computer stops booting with RAM-related error codes.
God. Damn. It. Now that we finally have power again, we can find out if our standoffs…screwed us. Having a stick in that top left-most DIMM is a good old 2F Initializing state. Trying with only two of the four sticks gets us to the installer. Hmmm. If only I could use those other slots like the manual wanted me to.

14: Mod life
Doing one side at a time for fear of our thermal compound being too exposed, I shortened three of the four brackets (one was happily slightly-too-wide over nothing important).

15: Stage clear
Now we’ve got some extra room and our DIMMs slot into place with room to spare.

16: Back in this thing
It worked!! I don’t know if it was the DIMM configuration, or the avoidance of the screwed area, or what, but we’re back on and registering all the RAM. (I thought about putting a stick back in the top left area to test, but then I thought about just not doing that ever and getting on with this, so I did the second thing.)

17: Gotta put the OS somewhere
18: Fan-cy
The case has this fan controller that takes a SATA power (boo!) and connects back to the motherboard and supposedly passes through stats about the fans while consolidating their placement…?

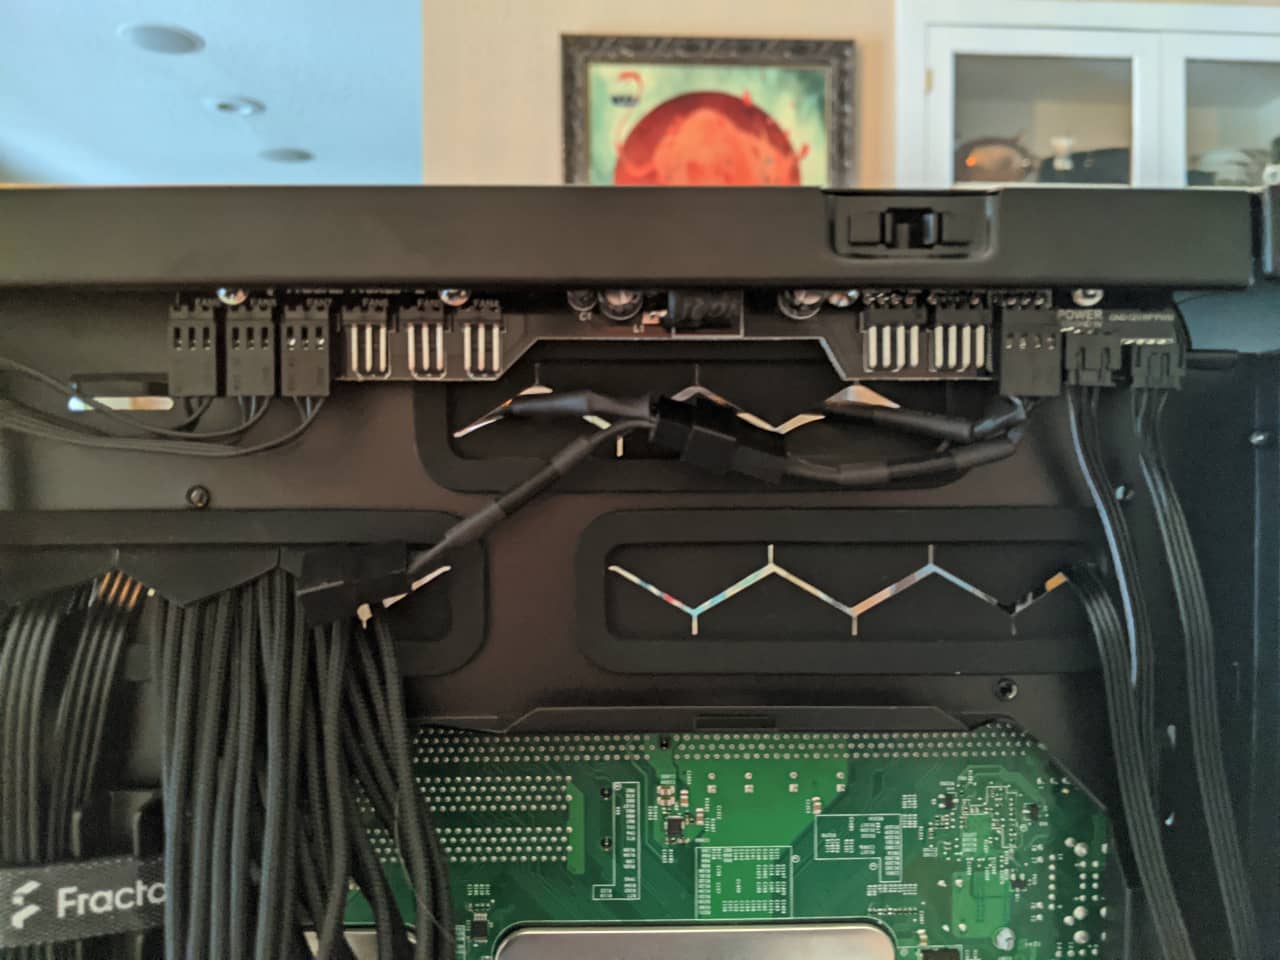
19: Front panel business
I unplugged the audio header cable completely (it was covered with a slightly sticky sealant of some kind), and pulled the reset button connection at the source. My board doesn’t do USB3 or USB-C, so those are the thick cables exiting the photo stage left…

20: You two, hang out behind this panel for a while, will you?
…and they got coiled up and are living over here. It’s not pretty, but it’s a nice use of that dead space. And the case doesn’t have a window, so I feel good about having them out of the way and not impeding airflow.

21: Let’s talk about the really hard parts of computer building

22: SATA cable modding
They’re stacked really close together over here. I intend to order some raw cables and bits and do this up a little nicer, but it’s good to have something immediately available so I can just get the thing working.

23: Put the cables in the cable ties

24: Goodbye for now
The sides of the case just pop in. No screws, no sliding with annoying latches. They just fit and then seal themselves. It’s great.

25: Done

26: Congratulations. Who cares?
So that’s my giant, entirely too powerful server. Now I’m just installing and configuring software for the rest of my days while waiting for drives to go on sale.
I’ll let you know how that goes.
Bonus photo:

Fractal is really wining the inside-the-box-game. Nice unexpected touch.