[Overview]
This project focuses around building an ADS-B receiver and delivering data to FlightAware. There are other sites you can deliver data to, such as The OpenSky Network and ADSBexchange, but that’s up to you!
Glossary of Aviation Terms
If you have questions about any of these terms or if you feel they are incorrect, please let me know. I’m happy to elaborate or correct any errors. I’ve done my best to keep it simple and accessible.
- 978 MHz - UAT (Universal Access Transceiver)
Older, being phased out. This is the frequency where FIS-B is broadcast.
Frequency for- 1090 MHz - The primary frequency for ADS-B
- Aloft - In the sky
This can refer to aircraft or weather phenomena.- ADS-B - Automatic Dependent Surveillance-Broadcast
Real time data for pilots, ATC, and other ground stations. Used to provide taffic, weather, and other flight information to increase safety and awareness.
Read more about ADS-B here.
As of 2020, all aircraft are required by the FAA to have ADS-B out capability.- ATAS - ADS-B Traffic Awareness System
Low-cost alerting system for general avaition to reduce the likelihood of aircraft collisions.
Read more about ATAS here.- ATC - Air Traffic Control
- CallSign - The name of the aircraft.
This may change depending on the flight. This is independent of the aircraft’s registration. ATC refers to the aircraft by its CallSign (if it has one) when communicating with the pilot.
You can look up aircraft CallSigns here and read more about them here.
Examples:
- DAL - Delta Airlines
- FDX - FedEx
- FFT - Frontier Flight
- GPS - Global Positioning System
- FIS-B - Flight Information Services - Broadcast
Data transmitted over 978 MHz regarding weather information.
Read more about FIS-B here.- IATA Station Identifier - Every airport has a 4 letter identifier. This is that.
Look up yours here.
Examples:
- Denver International (Denver, CO) -
DEN- Harrisburg International (Middletown, PA) -
MDT- Tokyo Haneda Airport (Tokyo, Japan) -
HND- ICAO Station Identifier - Every airport has a 4 letter identifier. This is that.
Look up yours here.
Examples:
- Denver International (Denver, CO) -
KDEN- Harrisburg International (Middletown, PA) -
KMDT- Tokyo Haneda Airport (Tokyo, Japan) -
RJTT- IFR - Instrument Flight Rules
Being IFR rated is basically the “pro” version of a pilot’s license. You are rated to fly under any condition, using only instruments without relying on visual aids.- NOTAM - Notice To Airmen
Information for wide dissemination to pilots on the ground and aloft.- METAR - Routine Aviation Weather Report
Contains data for the temperature, dew point, wind speed & direction, precipitation, cloud cover & heights, visibility, and barometric pressure. Reports are typically generated once an hour.- PIREP - Pilot Reported Weather
Weather conditions related from pilots to ATC.- Registration - This is the aircraft’s license plate, typically starting with “N”.
This is displayed on the rear fuselage or tail section of the aircraft.
You can read more about aircraft registration here or here.- SPECI - Special Aviation Weather Report
A Special METAR generated if conditions change significantly within the hour.
Examples: Thunderstorms or changing visibility conditions.- TFR - Temporary Flight Restriction
- TIS-B - Traffic Information Services - Broadcast
Data transmitted over 978 MHz and 1090 MHz regarding traffic information.
Read more about TIS-B here.- TRACON - Terminal Radar Control Facility
Basically, an airport that has radar and non-radar capabilites, handing arriving, departing, or transiting aircraft. Example: Denver International (KDEN)- Transponder - Equipment that aircraft have to send information to ATC and ground stations.
- Mode A - transponder that sends aircraft identifying code only
- Mode C - transponder that sends Mode A in addition to altitude or flight level automatically
- Mode C/S required for most high traffic areas
- Mode S - same as Mode C, but also permits other data exchange
- Mode C/S required for most high traffic areas
- TFC - Traffic
A general term referring to aircraft. Can refer to aircraft aloft or on the ground.- UAT - Universal Access Transceiver (978 MHz)
- UTC - Coordinated Universal Time
Formerly known as GMT (Greenwich Mean Time)- VFR - Visual Flight Rules
Being VFR rated is basically the “noobie” version of a pilot’s license. You are rated to fly under optimal conditions, using visual methods with instruments as aids.
Glossary of Hardware Terms
- SBC - Single Board Computer
Example: Raspberry Pi- SDR - Software Defined Radio
Read about SDR here.
[What is ADS-B?]
ADS-B stands for Automatic Dependent Surveillance-Broadcast (read the Wikipedia article here).
Basically, it’s a system that both Pilots and ATC uses to transmit data in real time to each other.
Pilots/ATC can:
- Send & receive traffic data (TIS-B) - relative distance, altitude, heading, and speed
- Send & receive weather/flight data (FIS-B) - METAR and SPECI reports, TFRs, and NOTAMs
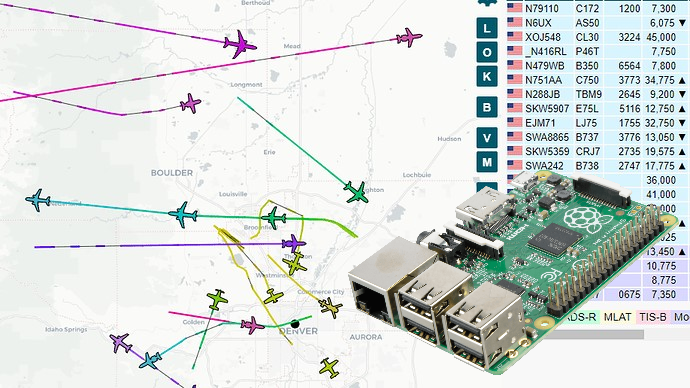
What can we see on the ADS-B receiver?

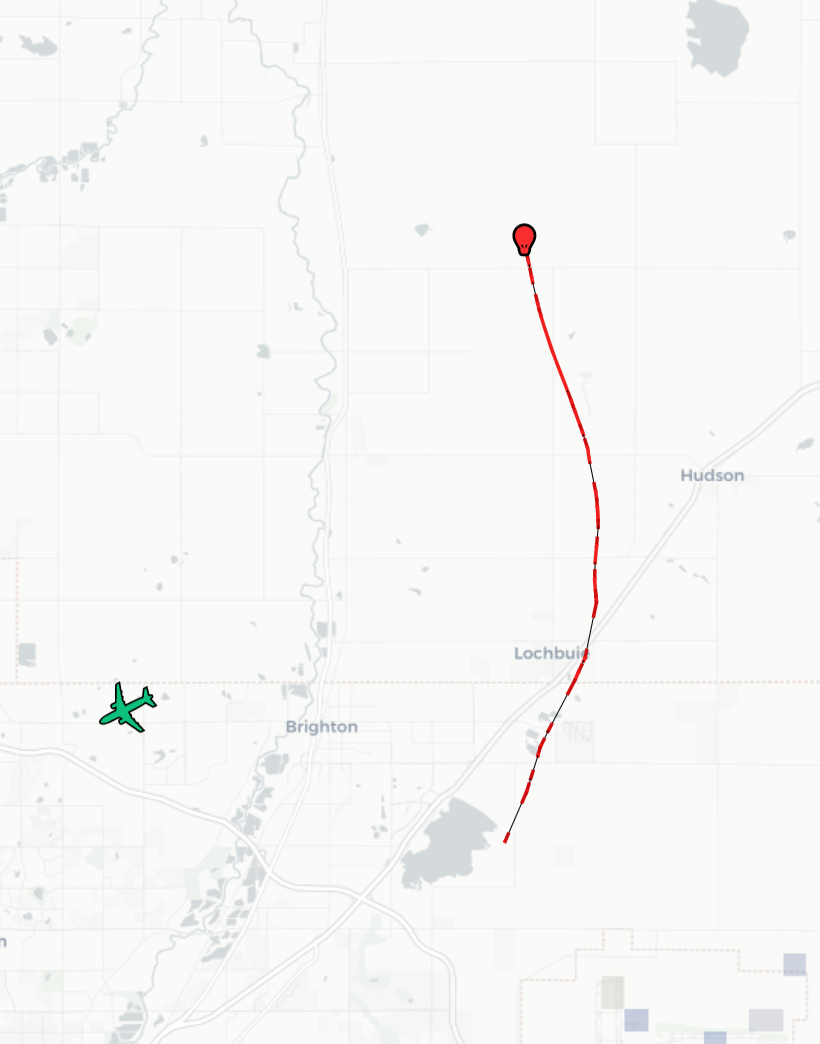
The ADS-B receiver shows an interactive map with aircraft of different colors, pointing in the direction they are flying. The color corresponds to aircraft’s current altitude.
![]()
NEXRAD weather information can also be overlayed on the map. It’s cool to see how ATC navigate aircraft around thunderstorms!

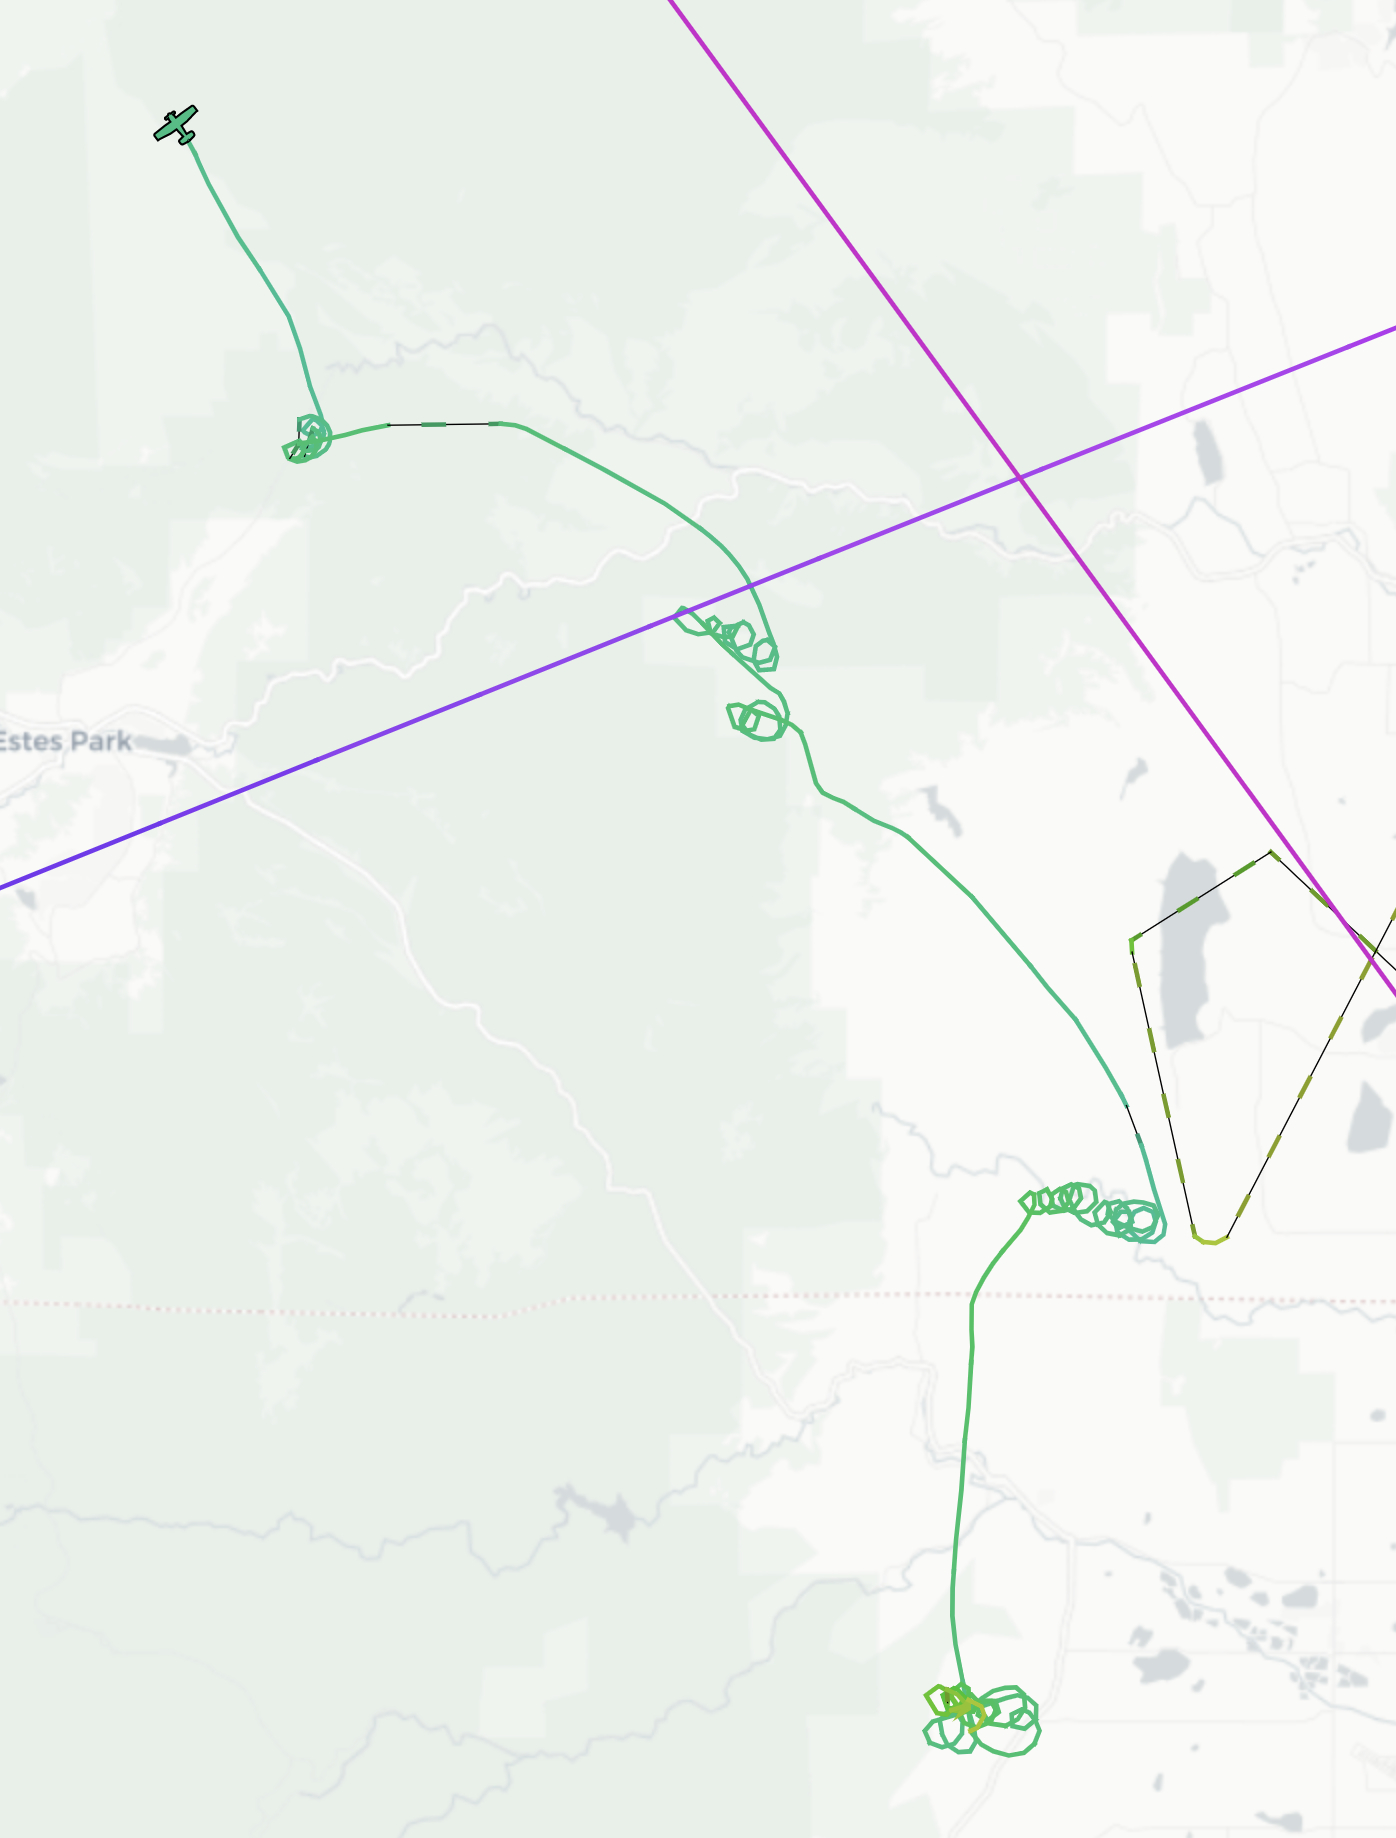
There’s also an option to show aircraft tracks - a history of where the aircraft has been since you have been tracking it. Simply click on the aircraft you want to track, or use the “show all tracks” button to show all of them.
You may notice that there are some dotted lines in the tracks - this is a gap in signal coverage. The airplane’s track is estimated based on last known position. (circled in white)

Tracking a flight
Let’s take a look at the flight below:

From top to bottom, left to right:
- Call sign: SWA6655
- ICAO identifier: AB4EB2
- Registration: N8312C
- Country of Registration: United States
- Aircraft Type: B738
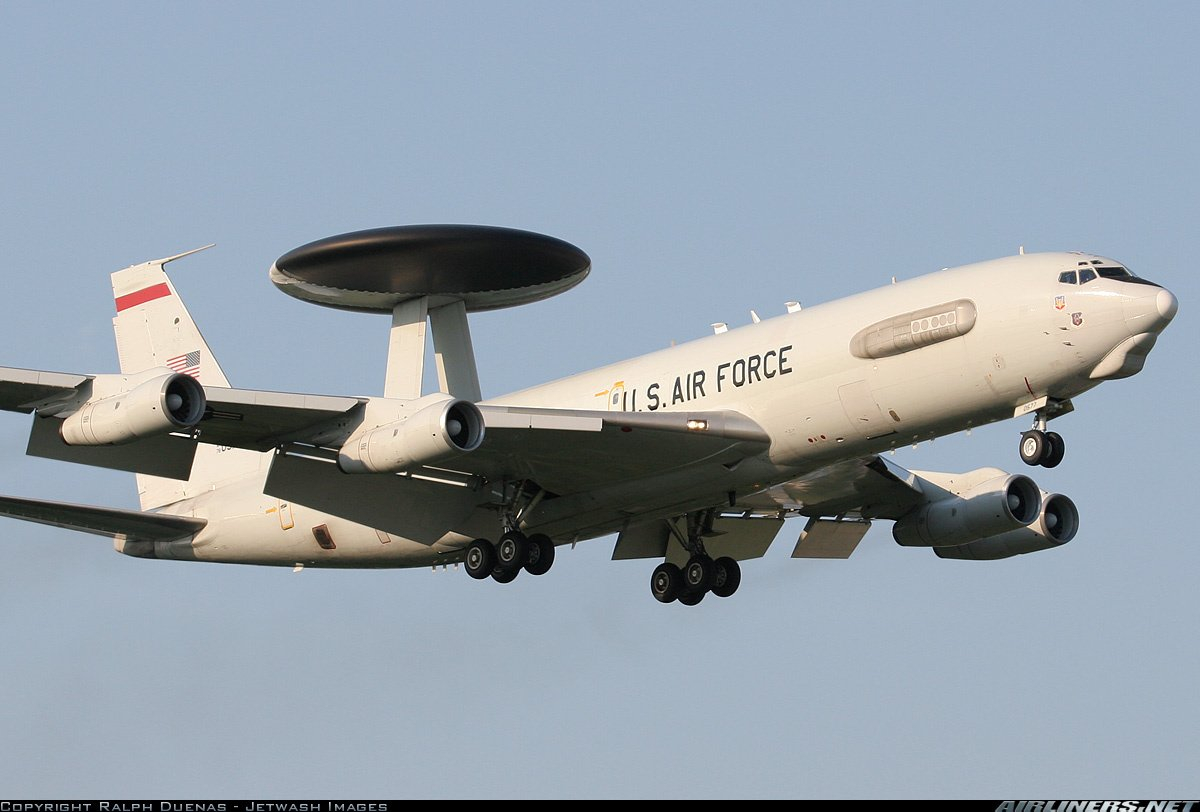
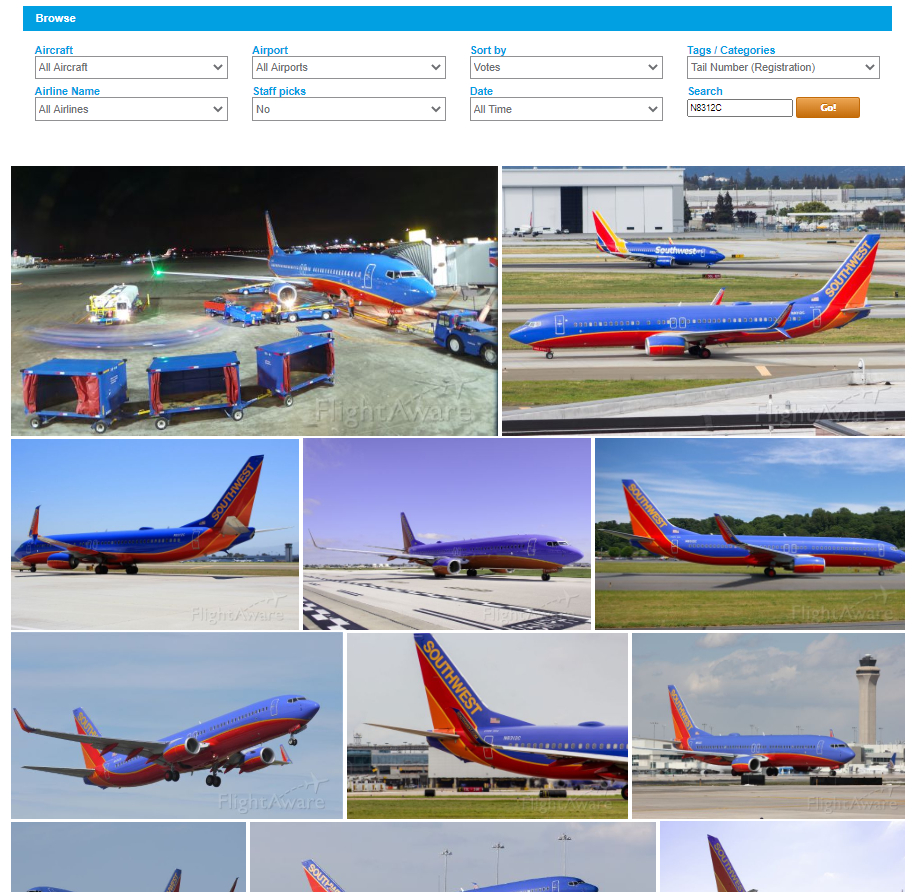
Clicking on “See Photos” searches for photos via the aircraft’s registration.
These are photos of the actual aircraft!
Clicking on “Visit Flight Page” takes you to the FlightAware page for that particular flight. You are contributing data to this page!

Scrolling down more on the card, the information is pretty self-explanatory:

[Hardware - Requirements]
General notes before getting started:
- ADS-B receivers (antennas) require line of sight. Walls and even windows can inhibit signal.
- Elevation is your friend. Get that antenna up as high as possible!
- Antennas are designed to work vertically, pointing straight towards the sky.
- USB SDRs get HOT. Active cooling of some sort is necessary.
Component overview
Below are the general parts that you need to get started with this project.
Main components
For this project, you need:
- SBC/Linux computer/Linux VM
- If you want to try out this software without dedicating a RPi to it just yet, you’d just need the SDR(s) on a Linux box or VM.
- Storage medium (for the OS and software)
- SDR(s) - 1090 MHz/978 MHz, this guide will use both.
- Antenna for your SDR
Optional Components
- Antenna extension(s)
- Magnetic antenna bases are super useful
- Battery backup
- Case for SBC
Build list
For my ADS-B receiver, I’m using a Raspberry Pi 3B+. It’s cheap and it can do everything we need. It has a ton of awesome accessories so you can customize it to your exact need. You can use another SBC, but that’s up to you. Make sure to have a quality 5V 3.0A PSU, as we will be running 3 USB devices. Typical power draw with the hardware listed below is about 7.5 watts.
| Category | Item | Price |
|---|---|---|
| SBC | Raspberry Pi 3B+ | $35 |
| MicroSD | Samsung PRO Endurance 32GB | $10 |
| PSU | HomeSpot 5V 3A | $11 |
| Case | SummitLink V3 | $17 |
| SDR | Nooelec Nano 2 | $40 |
| Antenna Exetensions | Ancable Magnetic Extension | $15 |
| Mount | ASOCEA suction cup | $13 |
| Total | $141 | |
| MicroSD card reader | Ugreen USB 3.0 SD/MicroSD | $11 |
Some notes about the items above:
- SBC - It’s what I had laying around, but it’s also what I would recommend. The 3B+ has good power delivery to its USB ports for the fan and SDRs.
- MicroSD - I chose a higher endurance card in hopes that it will last longer, but really you can use whatever.
- PSU - This is important. I’ve had really good success with these 5V/3A PSUs.
- Case - This case is sweet. It has a ton of antenna mounting options, included suction cups, two fans (one for SBC and one for SDRs), tripod mount, velcro strap, and more. It’s a great value and extremely well made.
- SDR - I chose the Nano 2 over the Nano 3 because they are $20 less for the pair. The only downside with the Nano 2 is that you have to remove the plastic casing to install both, but it’s super easy to do that. The kit also includes antenna leads and two types of antennas for each SDR.
- Antenna Extensions - For me, these are necessary. They are only 10ft long so you won’t be losing a lot of gain, but they have a strong magnet on the bottom. The magnet is easy to mount onto a balcony railing or roof of an RV…
There are definitely ways to slim down this parts list and make it more affordable. For example, you can use the included suction cups with the case instead of the suction mount. You could also run the RPi without a case, or you can also opt for just a 1090 MHz SDR instead of both 1090 and 978. Also, the antenna extensions might not be necessary depending on your setup.
[Software - Requirements]
Make a FlightAware Account
Join the serverbuilds.net flight crew!
Click the link below. It’s very similar to a Folding at Home team!
https://flightaware.com/flightcrew/8984648/4382
[Hardware - Building the ADS-B Receiver]
 with FlightAware/PiAware!")
[Software - Installation Instructions]
Insert your MicroSD card in the card reader before getting started.
Find Etcher and the PiAware image on your computer.

Open Etcher, and click “Flash from file”.

Select your PiAware image.

Click “Flash!”

Wait for it to finish…

When it’s done, it will eject the SD card from your computer.
Unplug it, and plug it back in. We have a little more work to do.

Open up the device named “boot”.
Edit “piaware-config.txt”

Find the section for wireless, enter your wireless SSID and password.
For this, I’m using my 2.4GHz network for longer range and better connection stability. The speed of 5.0GHz is completely unnecessary for this application.
Make sure to save your changes.

Enabling SSH:
Back in the root directory, make a copy of “start.elf”. Paste it into the root directory.

Rename the copy of “start.elf” to “ssh” with no extension. Press “Yes” when prompted.

[Tweaking]
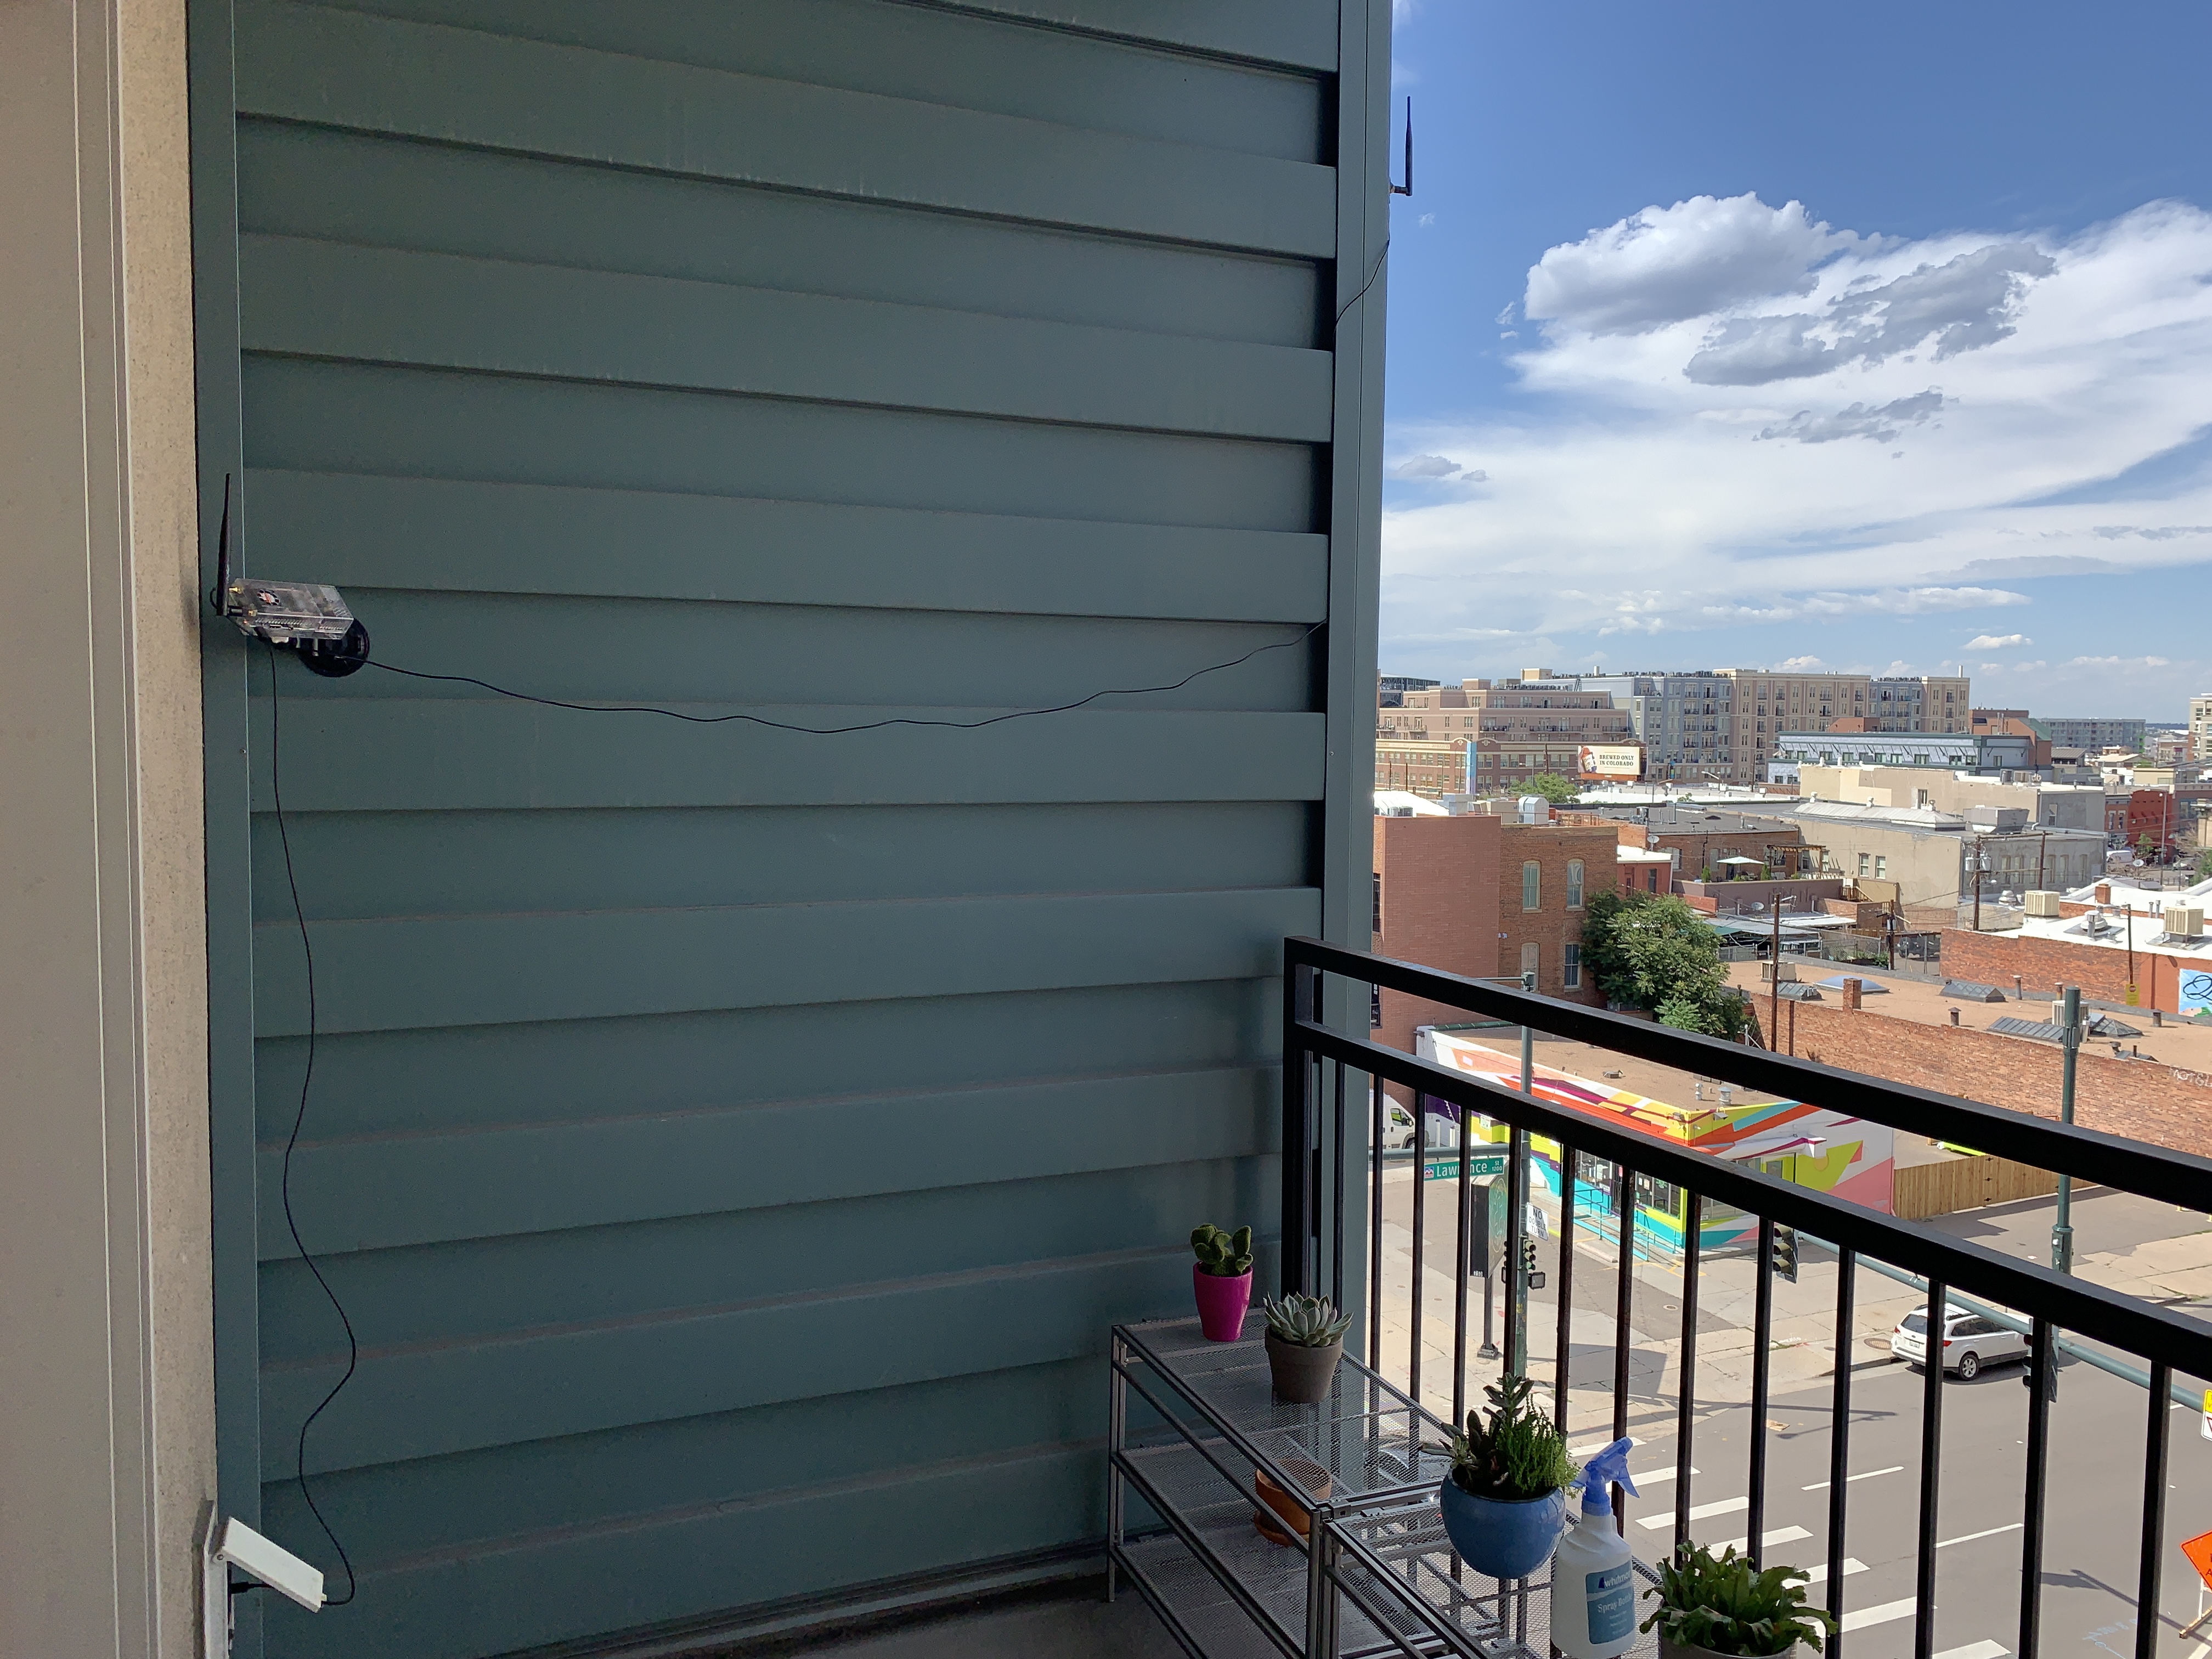
[Pictures]
I had to clean the steel(?) siding, as it was well covered with Colorado dust. After the surface was prepared, the suction cup stays put. The magnetic antenna works extremely well on its own, however. The antenna that is attached to the RPi is the 978 UAT, it’s there to pick up stray signals on the chance that someone is using it. I don’t care to spend extra to get an extender for it as well. I’ll figure a way to hide the wires a little better at some point.