Disclosure: (0) None
I purchased this with my own money, because it was cool. Read the review to find out why.
Overview
The fitlet2 is a very unique, small, and versatile x86 platform. It’s produced by Fit-IOT, and is one of just 3 products in their main lineup. I highly recommend venturing over to Fit-IOT’s website before reading the rest of this review.
For this community’s purposes, the fitlet2 could be used for many things: pfSense/OPNsense, Roon client, IOT device, magic mirror, and more. It’s just about the smallest, most capable PC I’ve seen!
Hardware
This particular fitlet2 features the Intel Atom E3930, as it’s the entry-level model.
I purchased mine on ebay, in “used” condition with a 128GB M.2 SATA SSD and 2GB of RAM. Unfortunately, there are no more available from this listing.
The fitlet2 is available at Amazon and other retailers, however.
Starter kits
- E3930 barebones (link)
- CPU: Atom x5-E3930 dual-core (2C/2T)
- Dual display HDMI + mini-DP
- Dual Gb Ethernet (Intel i211)
- Up to 16 GB RAM (DDR3L single SODIMM, not included)
- M.2 2230/2242/2260 SATA SSD (not included)
- E3950 barebones (link)
- CPU: Atom x7-E3950 quad-core (4C/4T)
- Dual display HDMI + mini-DP
- Dual Gb Ethernet (Intel i211)
- Up to 16 GB RAM (DDR3L single SODIMM, not included)
- M.2 2230/2242/2260 SATA SSD (not included)
- J3455 barebones (link)
- CPU: Celeron J3455 quad-core (4C/4T)
- Dual display HDMI + mini-DP
- Dual Gb Ethernet (Intel i211)
- Up to 16 GB RAM (DDR3L single SODIMM, not included)
- M.2 2230/2242/2260 SATA SSD (not included)
SSDs
- M.2 SATA 2242
RAM
- 4GB DDR3-1600 1.35v SODIMM
- 8GB DDR3-1600 1.35v SODIMM
- 16GB DDR3-1600 1.35v SODIMM
Note: 16GB SODIMMs are very expensive and hard to find.
Add-on modules & accessories
- FC-USB (link)
- 4 USB 2.0 ports
- M.2 E-key socket for Wi-Fi
- FC-M2LAN (link)
- 2 Intel i211 ethernet ports
- FC-POED (link)
- GbE port which can power the fitlet2 via 802.3af/802.3at POE
- M.2 E-key socket for Wi-Fi
- M.2 M-key socket for 2280/2260 SATA SSD
- FC-PCI FACET-Card (link)
- Mini-PCIe + SIM for 3G/4G modem
- M.2 E-key socket for Wi-Fi
- M.2 M-key socket for 2280/2260 SATA SSD
- FC-OPLN FACET-Card (link)
- SFP Fiber Optic 1000 BASE-X 802.3z Gigabit via Intel i210-IS
- M.2 E-key socket for Wi-Fi
- M.2 M-key socket for 2280/2260 SATA SSD
- 2.5" HDD/SSD adapter (link)
- VESA mount braket (link)
Shipping & Packaging
The fitlet2 was shipped in a plain white box with minimal markings, just like a lot of SBC style computers. Nothing special!


Inside is the fitlet2 and the power adapter.

Just about every plug adapter you could ever need is included.

It’s a 12V 3A adapter (36W).


External Overview
Most fanless PCs of this style are kind of ugly. I think this one is quite attractive!

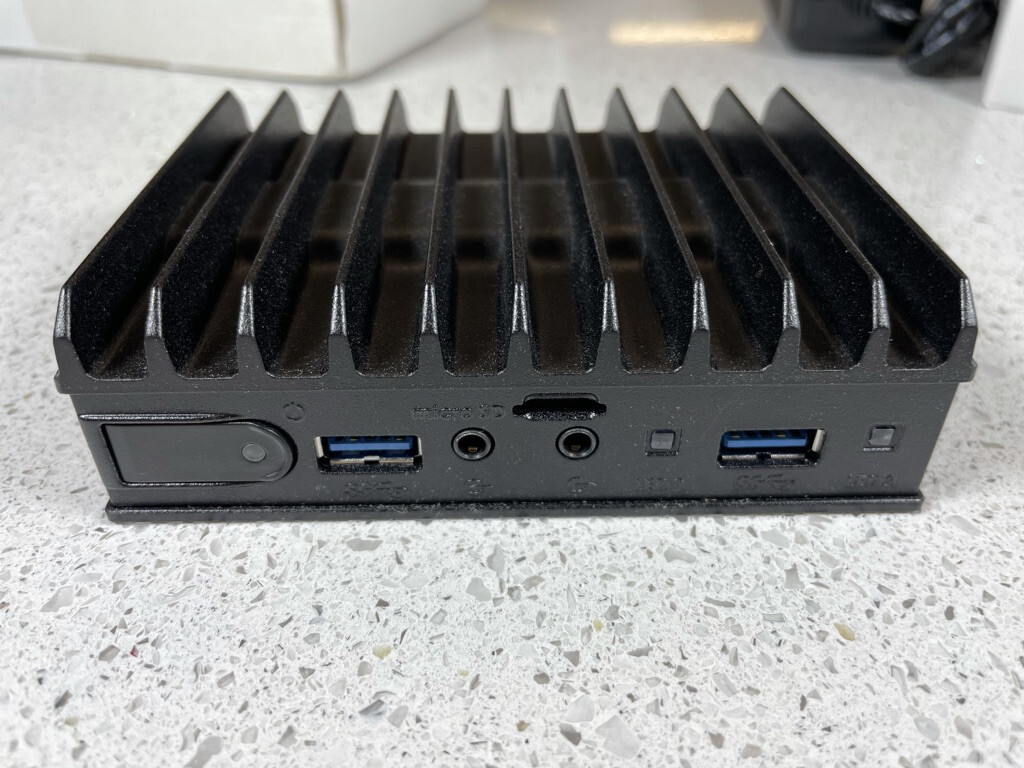
From left to right: Power button, USB 3.0, Microphone, MicroSD, Headphone, LED1, USB 3.0, LED2
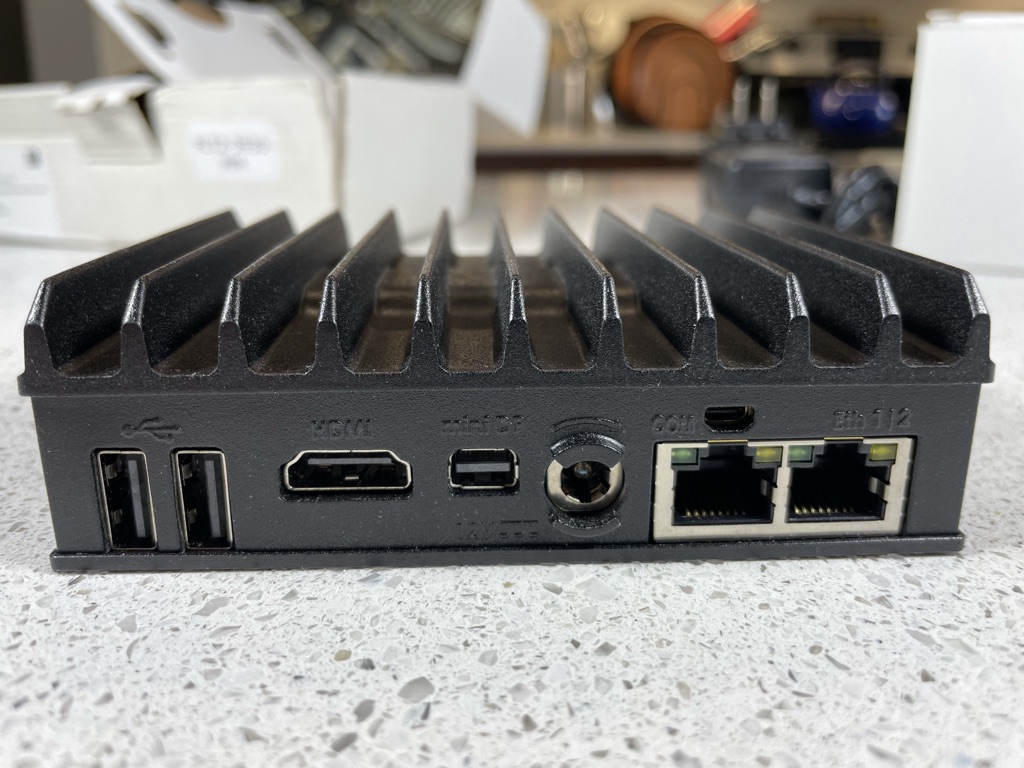
From left to right: 2 x USB 2.0, HDMI 1.4b, mini DisplayPort, DC power with locking connector, COM port, ETH1, ETH2

Not much to see on either side of the unit. The blank metal plates on the sides are easily removed to accommodate various hardware configurations.

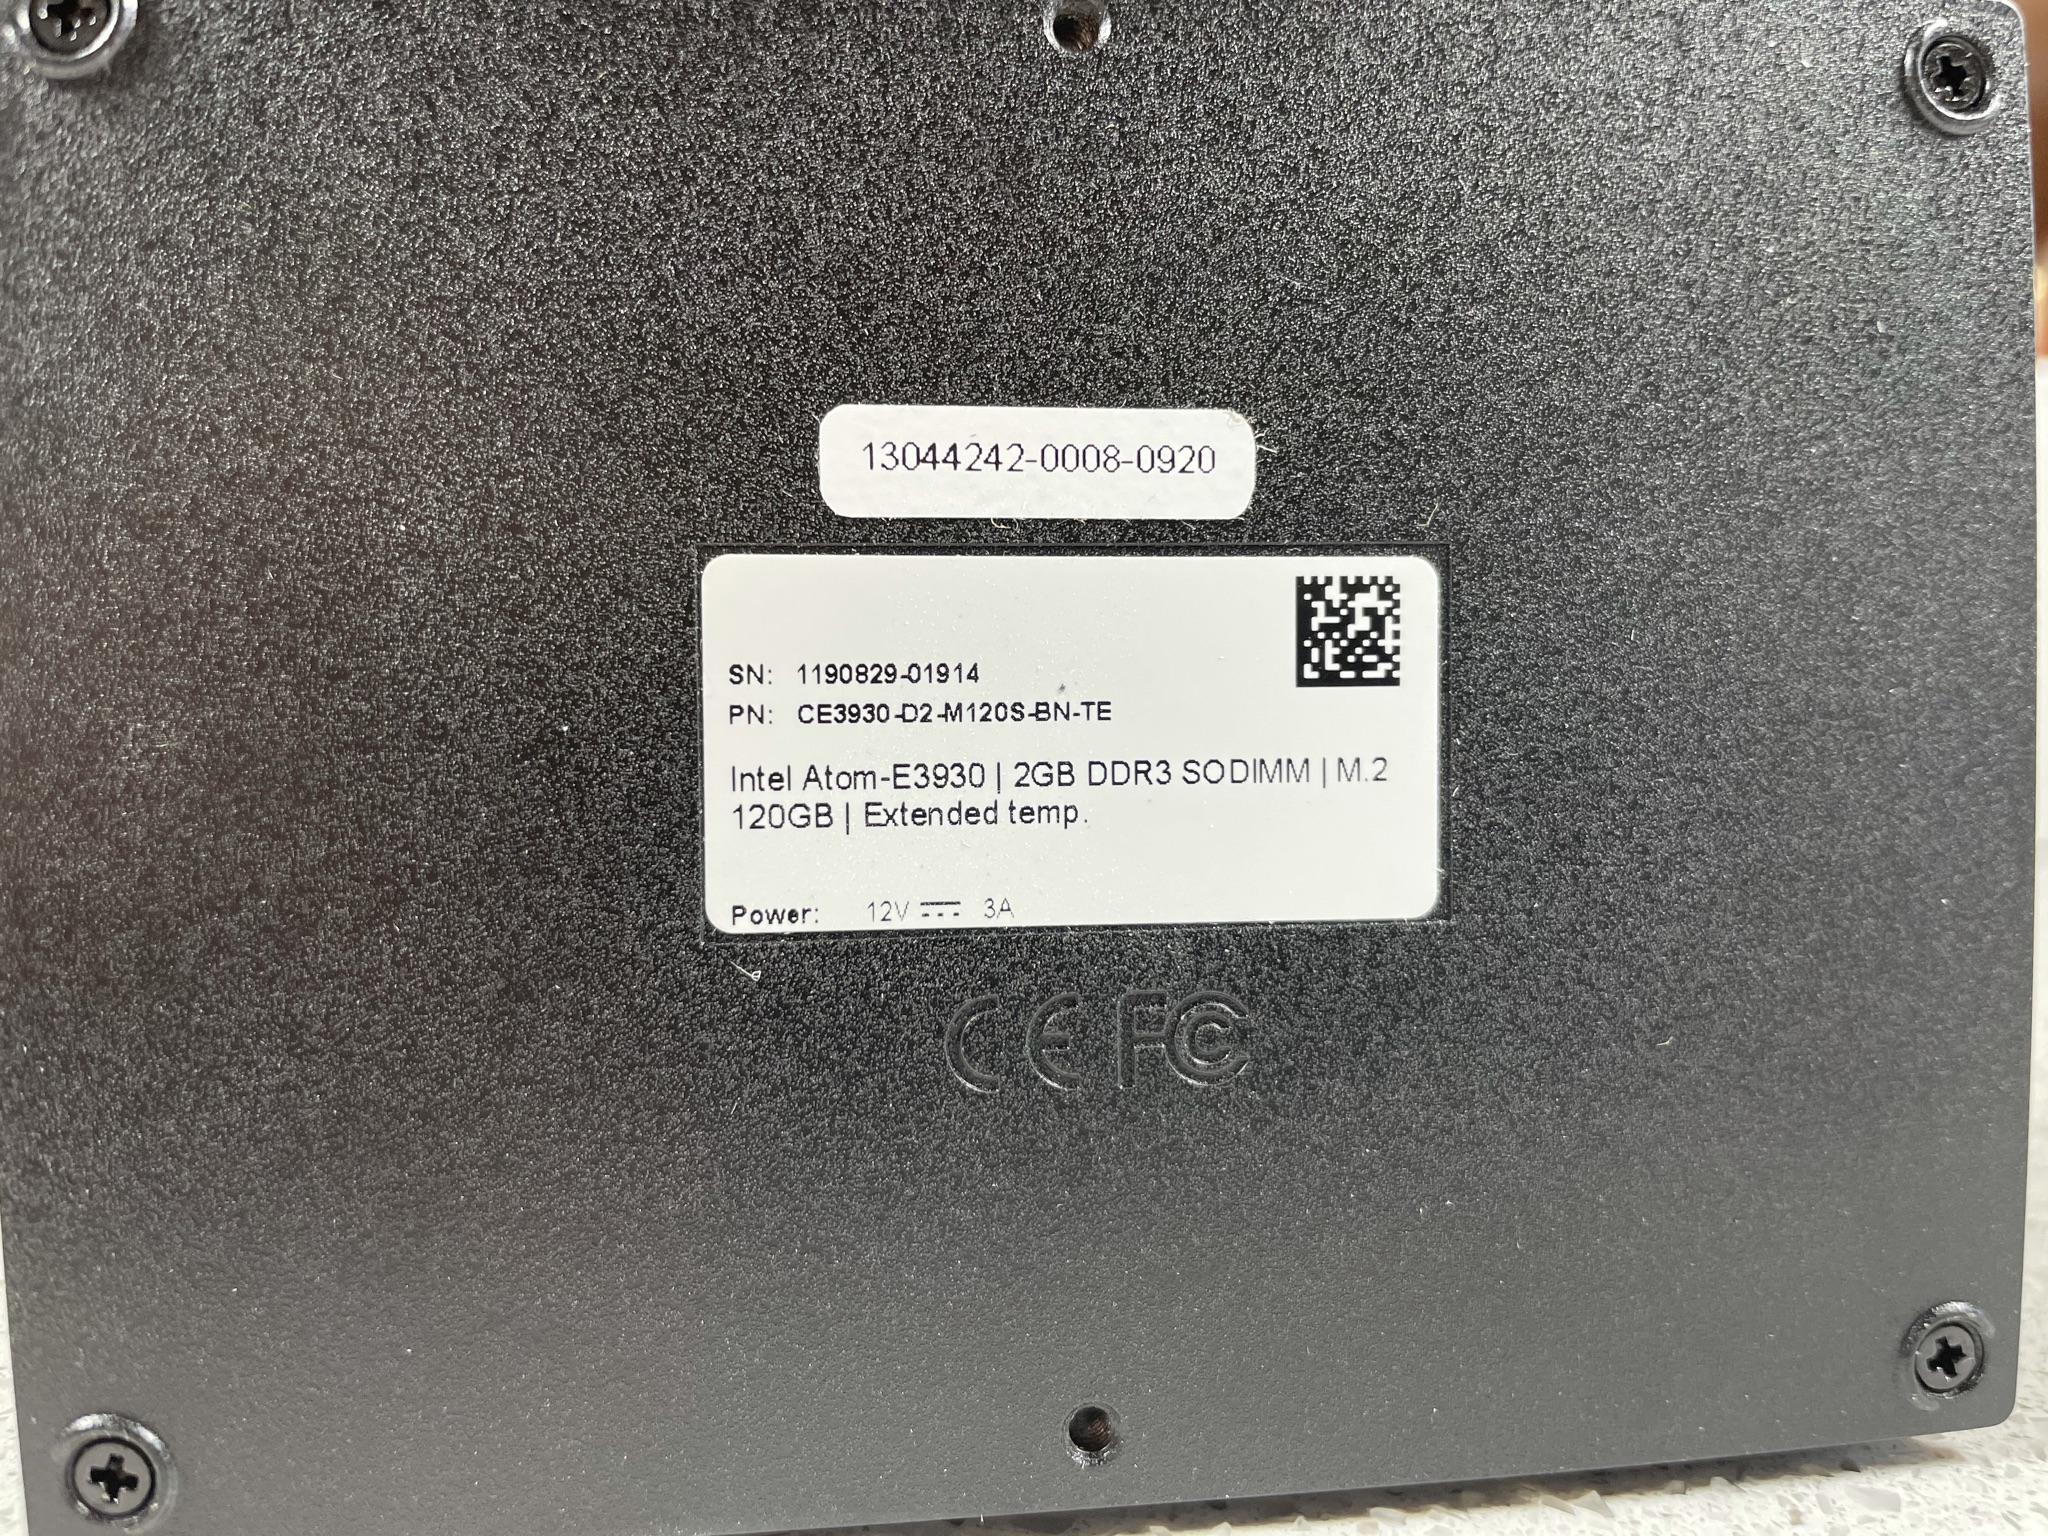
Some various hardware configuration details on the bottom. Note, this unit actually came with a 128GB M.2 SATA SSD, but the label says 120GB.
Disassembly and Internal Overview
Tools used:
- UnaMela 122 in 1 kit
- #0 Philips
- #00 Philips
- Gelid GC Extreme thermal paste
Damn, the fitlet2 is much smaller than the tool kit!

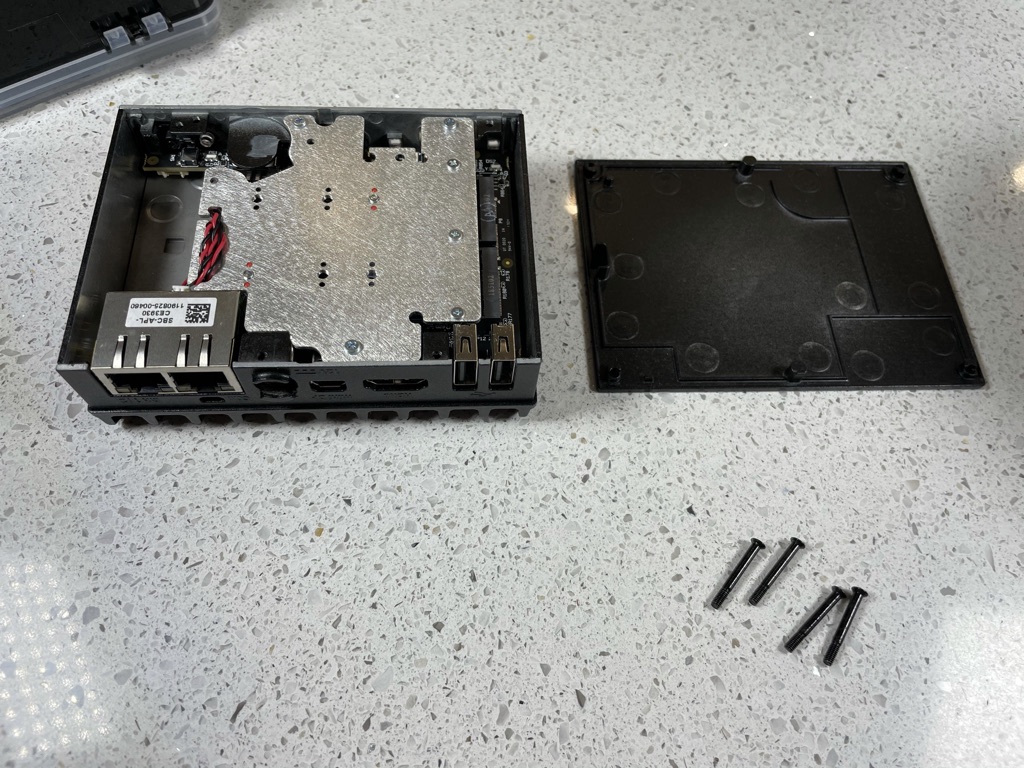
We need the #0 Philips for the 4 screws at the corners.

The 4 screws are quite long, and fasten the heatsink part of the case like a clam shell.
Inside, there’s another heatsink that acts as a mounting plate for the M.2 devices. There are 6 screws, 3 on the outside edges, and 3 in a line towards the middle. I removed all 6, but really you just need to remove the 3 on the outside edge nearest the case wall. These are #00 Philips.
Looks like the interchangeable side plates are already coming off.
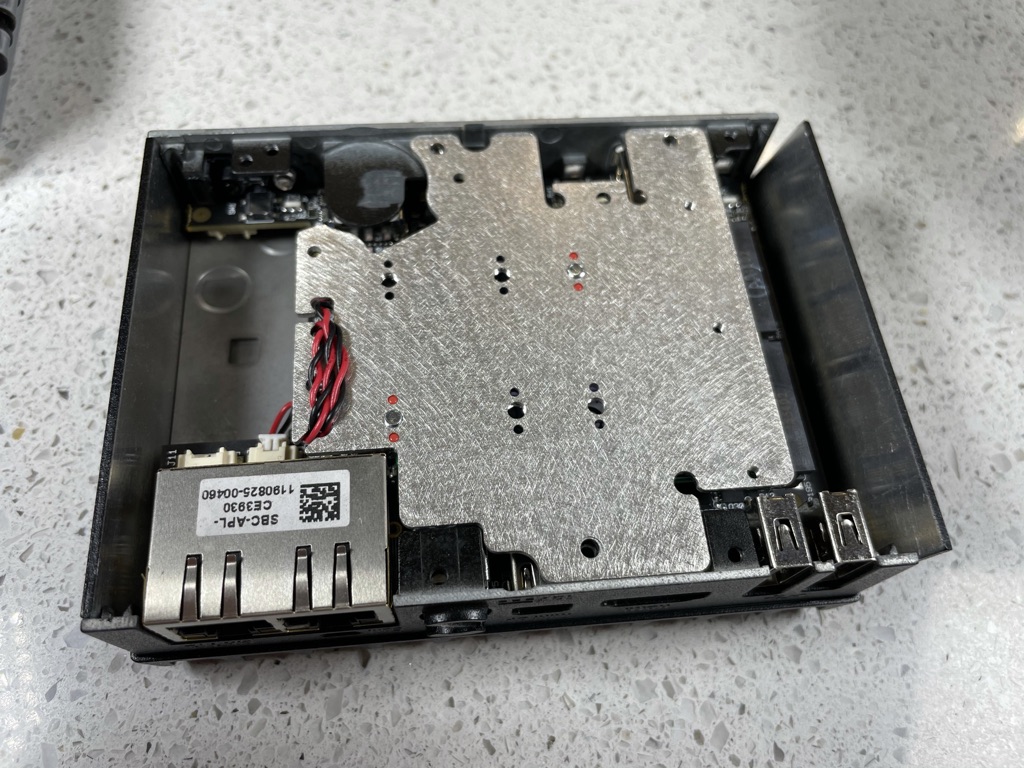

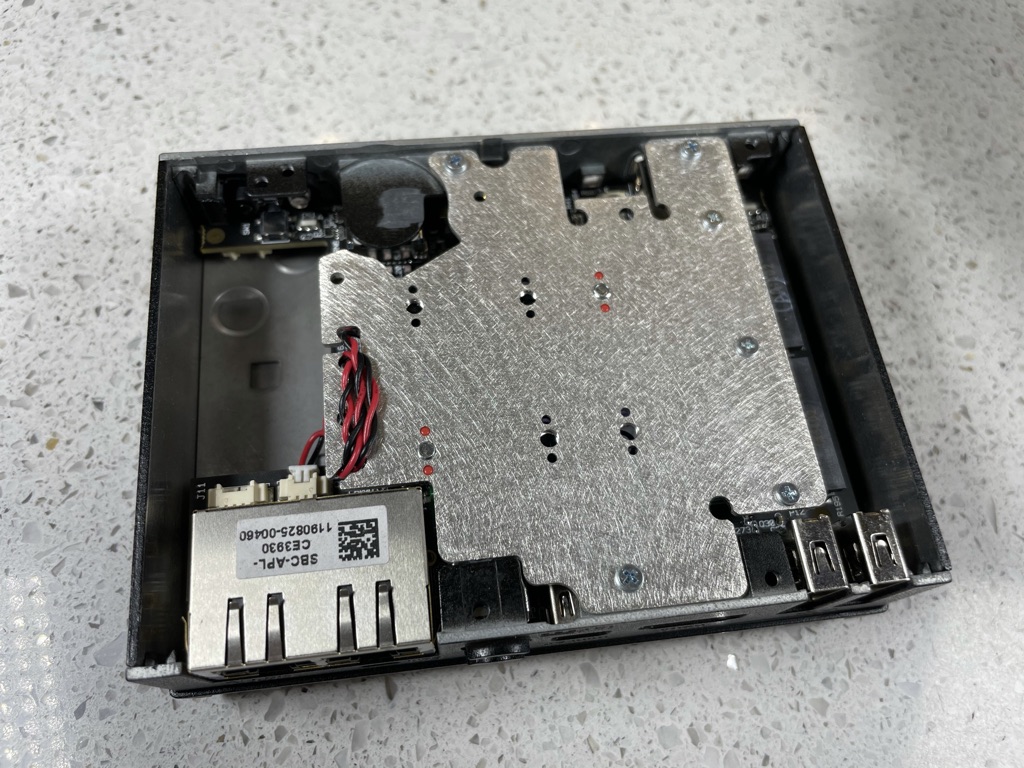
The main heatsink is also not attached, so let’s remove it from the main motherboard assembly.

This 2 pin red/black connector is for the CMOS battery, and needs to be unplugged before further disassembly.

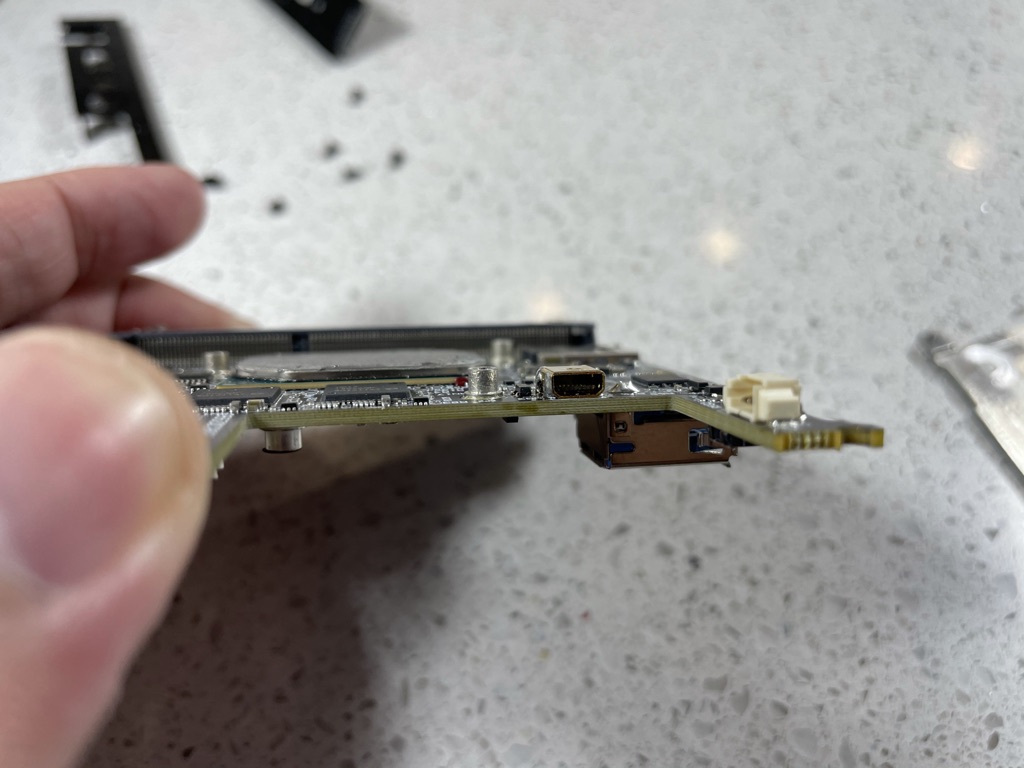
Gently lift the metal plate to about a 45 degree angle, and de-socket the M.2 as you would normally. The drive will remain attached to the heatsink.

This is actually pretty cool. M.2 drives are mounted to the heatsink directly with a standoff that can be moved based on drive size. Thermal pads are included!


Lets take a closer look at the M.2 SATA SSD. It’s a 128GB Transcend TS128GMTS600, nothing special. Pretty typical for average consumer computers, especially laptops.

One last look at the heatsink with the drive removed.

Let’s take a look at the motherboard since the M.2 assembly is removed.


Unfortunately, the motherboard is labeled with component numbers, nothing easily discernible.

Flipping the unit over, we find yet another heatsink and the single DDR3 SODIMM module and slot.

Installed is an Apacer 2GB 1.35V PC3-12800 SODIMM (DDR3-1600). Low voltage and good speed. Up to 16GB on a single DIMM is supported.


There are 7 more #00 Philips screws. The 4 on the outside attach the front and back I/O plates. The 3 in the middle attach the CPU heatsink.
Remove the 4 on the outside first, then remove the I/O plates.

Next, remove the 3 in the middle. With some very light prying, the heatsink can be removed.


Interesting, looks like there’s some damage to the back side of the SODIMM slot. Hopefully it doesn’t affect functionality of the unit.
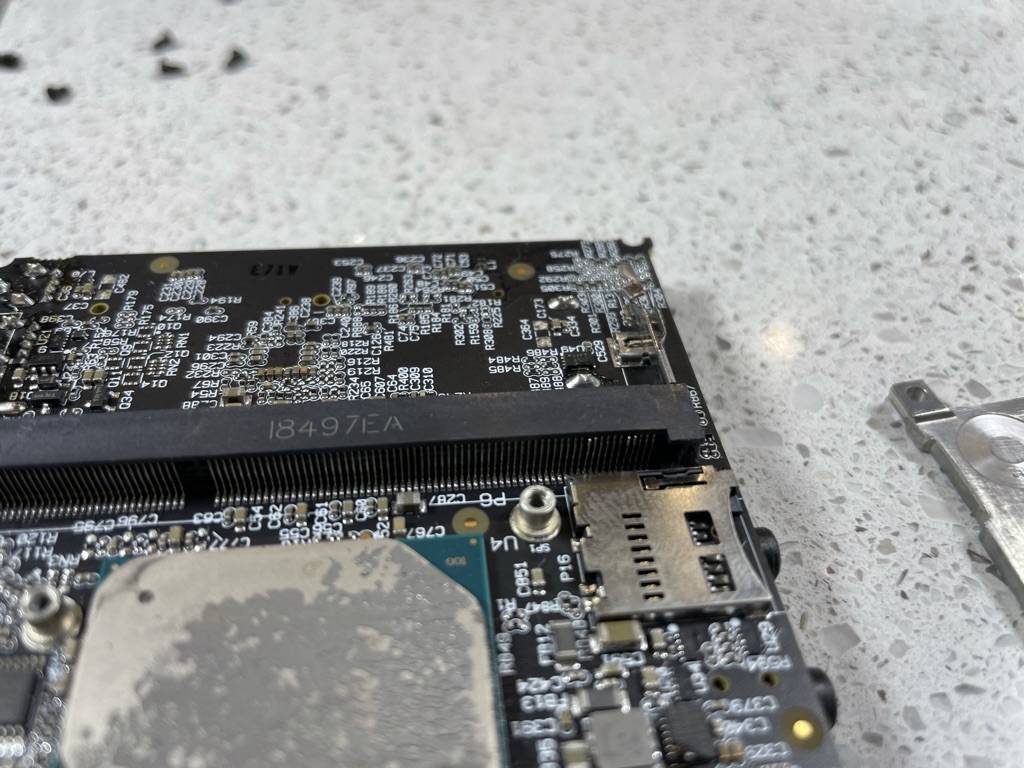
Looks like there’s an internal COM port as well. I wonder if this is for reprogramming some aspect of the motherboard.
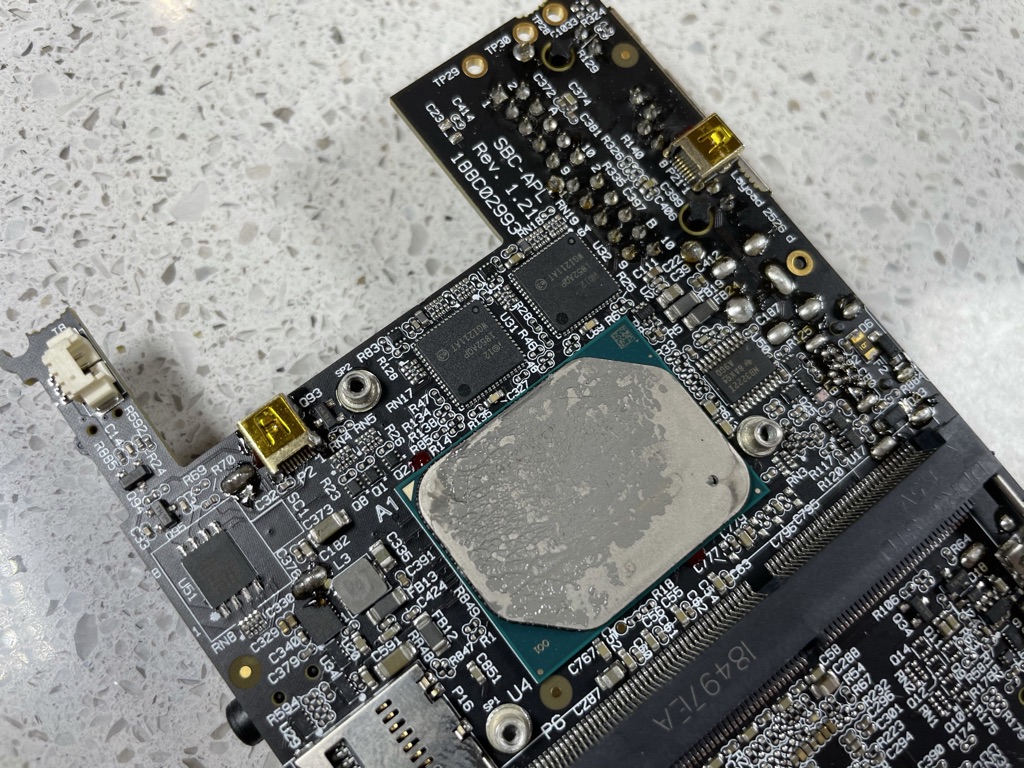
After cleaning off the very muddy thermal paste, we can see the Intel Atom E3930.

Let’s repaste with Gelid GC Extreme.

Reassembly is as simple as following the steps in reverse order! There’s quite a lot of screws for this tiny unit, but at least it’s quite simple.
BIOS
The BIOS of this unit is fully featured, much more than I can cover in this guide.


Software
Windows
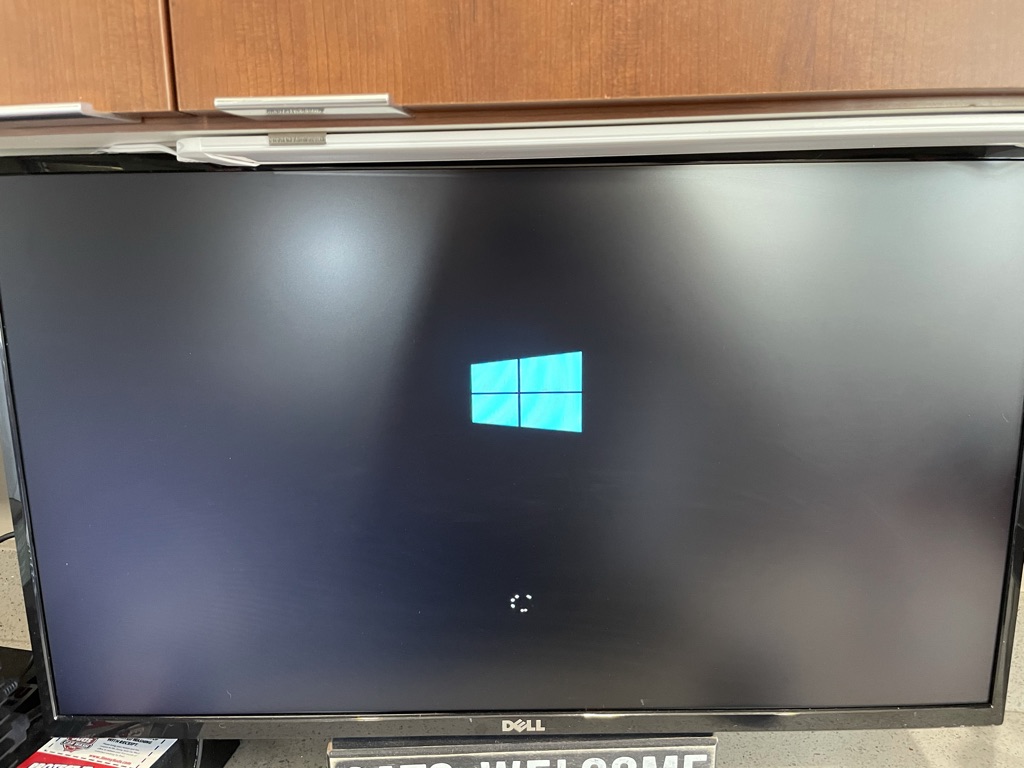
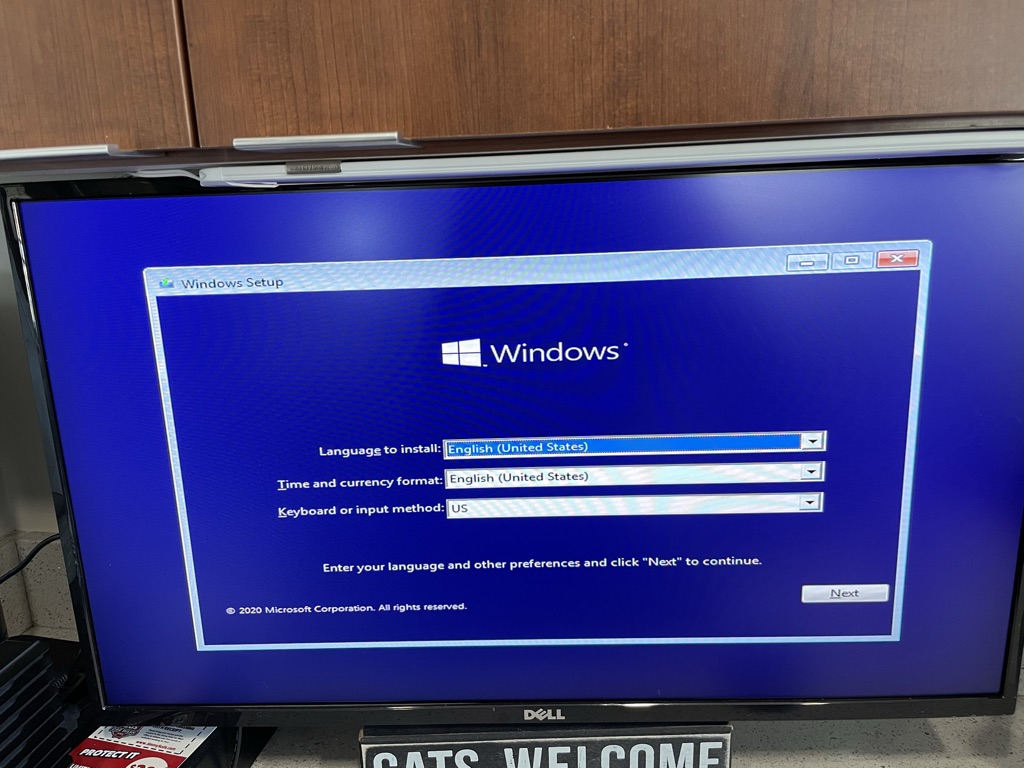
After changing the OS Selection to Windows in the BIOS, the system immediately booted from USB.
Thermals
With a full CPU and disk stress test for 45 minutes, the CPU only reached 60℃ and did not throttle.
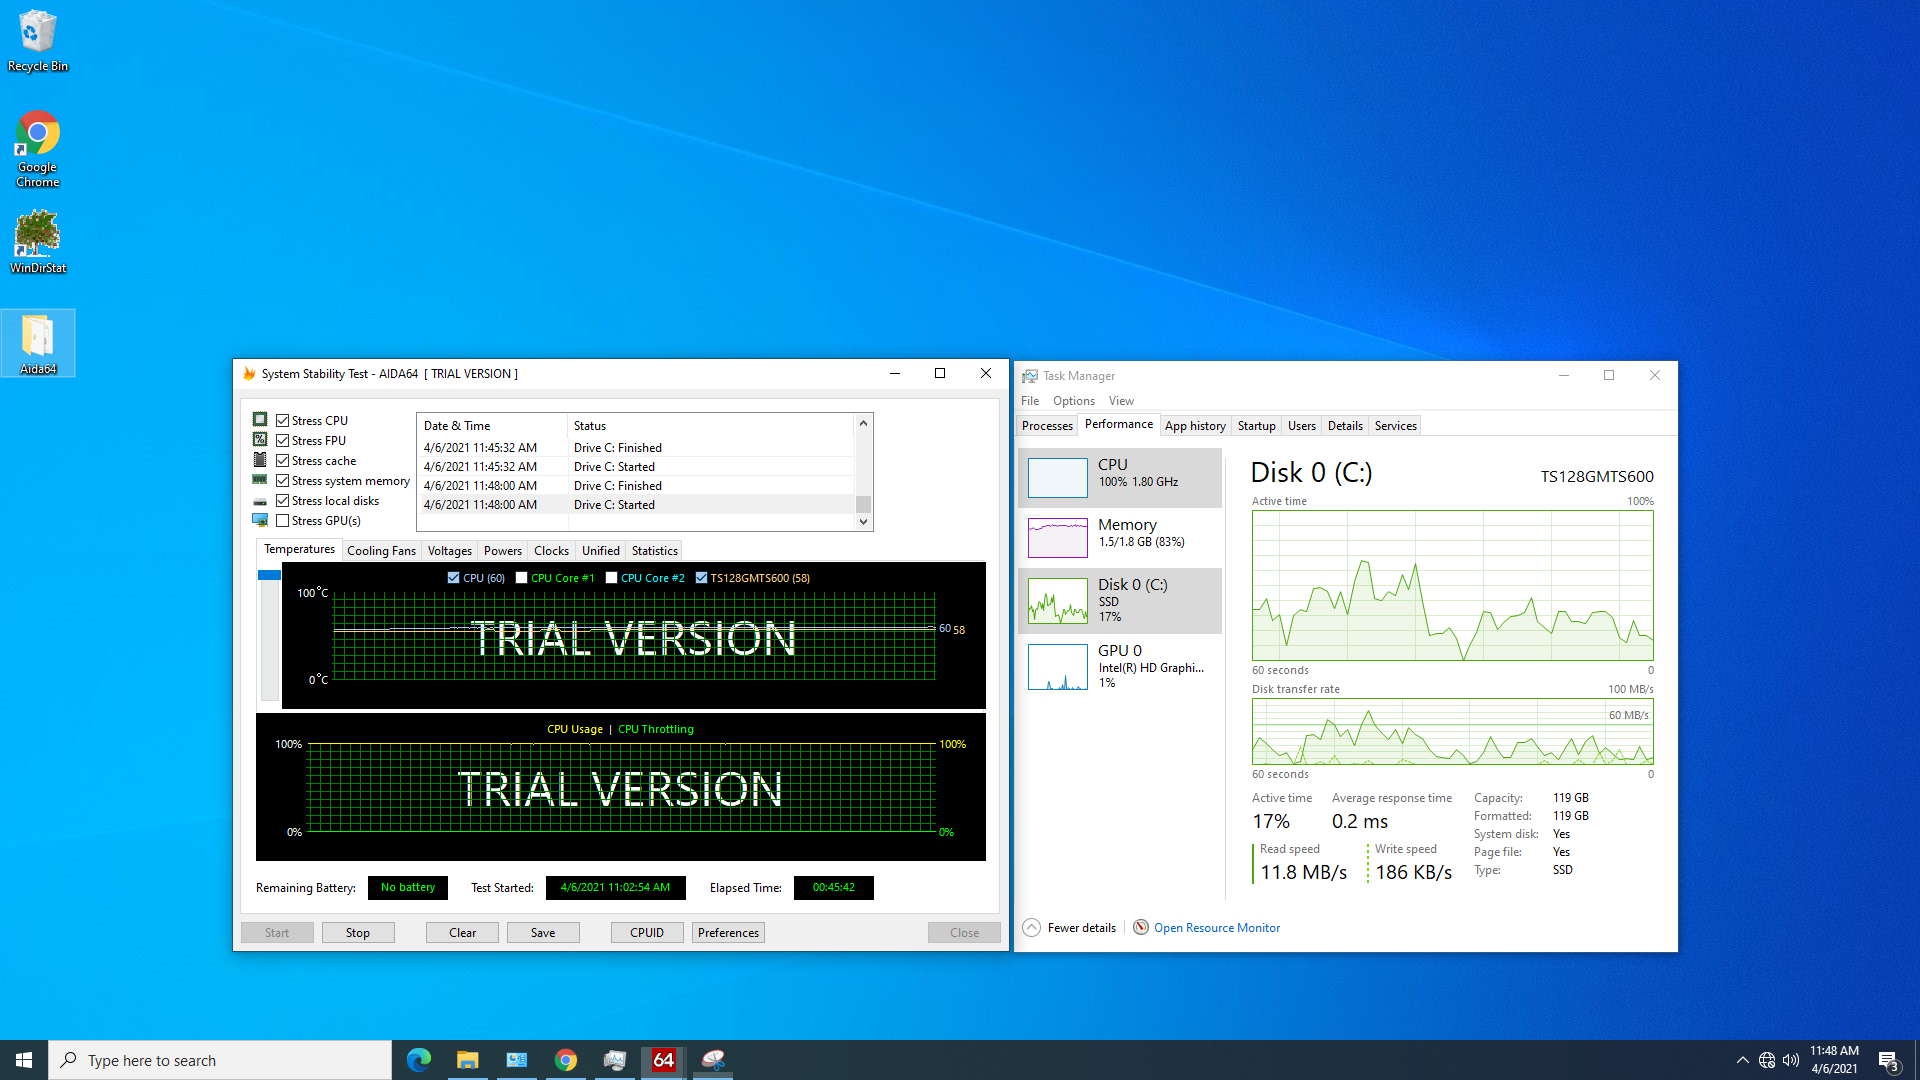
During the 45 minute stress test, the outside of the chassis reached steady state at 54.1℃!

Conclusion
The fitlet2 is an awesome little device. The price is on the higher end of normal for this level of hardware, but considering the form factor, fan-less operation, and versatility, I think it’s well worth the price of entry.

 I got that part, but I was curious to what the hardware differences are.